Best Italian Pasta Salad Recipe- Easy & Delicious
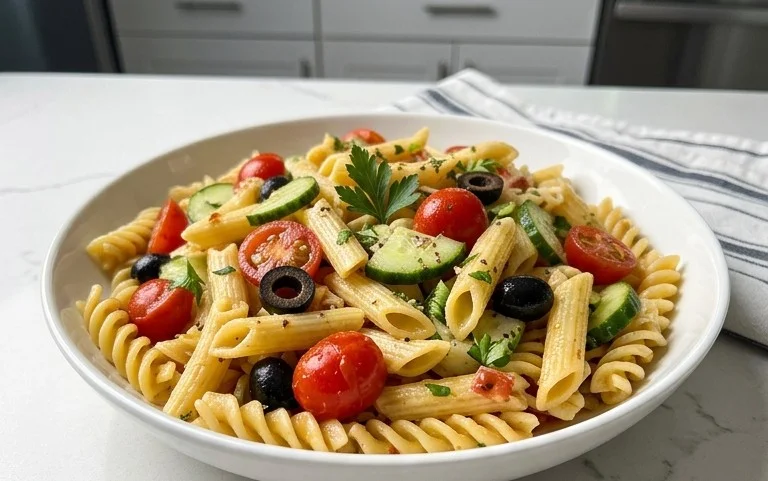
Italian Pasta Salad is more than just a side dish; it’s a vibrant celebration of fresh flavors and textures, a guaranteed crowd-pleaser that evokes sunshine and good times. Imagin extracte perfectly cooked pasta, tossed with crisp vegetables, salty olives, tangy marinated artichoke hearts, and a zesty Italian dressing that ties everything together. It’s no wonder this Italian Pasta Salad is a perennial favorite for picnics, potlucks, and casual get-togethers. What makes it so special? It’s the delightful balance of simple, high-quality ingredients that sing in harmony. Whether you’re a seasoned cook or just starting out, this Italian Pasta Salad recipe will become your go-to for a dish that’s as easy to make as it is delicious to devour. Get ready to impress your friends and family with this delightful creation!
Italian Pasta Salad: A Crowd-Pleasing Classic
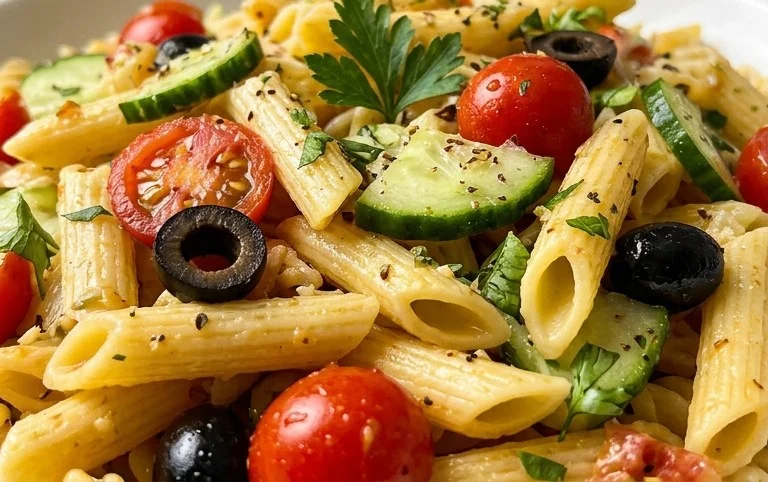
There’s something undeniably satisfying about a perfectly crafted Italian pasta salad. It’s a dish that screams summer picnics, casual get-togethers, and even a flavorful weeknight dinner. My version is a vibrant medley of textures and tastes, packed with fresh vegetables, briny olives, and a zesty dressing that ties it all together. This isn’t your average bland pasta salad; it’s a symphony of Mediterranean-inspired flavors that will have everyone asking for the recipe. The beauty of this dish lies in its simplicity and the ability to customize it to your liking, but this core recipe provides a fantastic foundation for deliciousness.
Ingredients:
Cooking Instructions
Preparing this Italian Pasta Salad is a straightforward process, but each step contributes to the overall success of the dish. The key is in the preparation of the pasta and the creation of a flavorful dressing that will coat every component beautifully.
First, let’s get our pasta cooked to perfection. Bring a large pot of salted water to a rolling boil. Add the 1 lb. of fusilli pasta to the boiling water. Fusilli, with its corkscrew shape, is ideal for this salad as it holds onto the dressing wonderfully. Cook the pasta according to the package directions, aiming for al dente. This means the pasta should be tender but still have a slight bite to it. Overcooked pasta will become mushy, which is the enemy of a good pasta salad. Once cooked, drain the pasta thoroughly in a colander. It’s important to drain it well to prevent any excess water from diluting the dressing later on. For an extra step to prevent the pasta from clumping, you can toss it with a tablespoon of olive oil immediately after draining. Then, spread the drained pasta out on a baking sheet or large platter to cool completely. Allowing it to cool is crucial, as adding hot pasta to the other ingredients, especially the cheese and spinach, can cause them to wilt or melt prematurely, affecting the texture and appearance of the salad.
While the pasta is cooling, it’s time to assemble the vibrant heart of our salad. In a large mixing bowl, combine the cooled, drained fusilli pasta. Then, add the 1 (15-oz.) can of chickpeas, which have been drained and rinsed to remove any residual liquid from the can. Next, introduce the 1 pint of cherry tomatoes, halved for easier eating and to release their juicy sweetness. To this, add 1 cup of thinly sliced mini sweet peppers, which offer a delightful crunch and mild sweetness. We’ll also incorporate 3/4 cup of sliced pepperoncini peppers for a tangy, slightly spicy kick that is characteristic of Italian flavors. Don’t forget the 3/4 cup of pitted kalamata olives, halved. Their briny, rich flavor is essential to the Mediterranean profile of this salad. Finally, add 1 cup of grated Parmesan cheese, its salty, nutty notes a perfect complement to the other ingredients. If you prefer a milder cheese, you can adjust the amount or opt for a combination of Parmesan and Pecorino Romano.
Now comes the magic of the dressing. In a separate medium bowl or a jar with a tight-fitting lid, whisk together the 1/2 cup of extra-virgin extract olive oil and the 1/4 cup of red grape juice vinegar. Red grape juice vinegar provides a beautiful color and a slightly fruity tang that complements the other Italian flavors. If you don’t have red grape juice vinegar, a good quality red grape juice vinegar will also work beautifully. Next, add the 2 tablespoons of pepperoncini brine. This is a secret weapon for adding an extra layer of tangy flavor and a hint of the pepperoncini’s essence. If you don’t have pepperoncini brine handy, fresh lemon juice is an excellent substitute. Add the 3 tablespoons of minced shallots and 2 minced garlic cloves. Shallots offer a milder, sweeter onion flavor than regular onions, which is ideal for a salad dressing. Finally, sprinkle in 2 teaspoons of dried oregano, a quintessential herb in Italian cuisine. Whisk or shake the dressing vigorously until all the ingredients are well combined and emulsified. Taste the dressing and adjust seasonings if necessary. You might want a little more vinegar for tang, or a pinch of salt and pepper.
It’s time to bring all these delicious components together. Pour the prepared dressing evenly over the pasta and vegetable mixture in the large bowl. Gently toss everything together, ensuring that every piece of pasta, every vegetable, and every olive is coated with the vibrant dressing. Be thorough but gentle to avoid breaking up the ingredients too much. Once everything is nicely coated, add the 3/4 cup of small cubed provolone or mozzarella cheese. The type of cheese you choose can subtly alter the flavor profile, with provolone offering a sharper taste and mozzarella a milder, creamier texture. Then, add 2 to 3 cups of fresh baby spinach, roughly chopped. The residual heat from the pasta, even if it’s cooled, will slightly wilt the spinach, allowing it to integrate beautifully into the salad. If you prefer your spinach crisp, you can add it just before serving. Toss again gently until the spinach is just incorporated.
For the best flavor, allow the pasta salad to chill and meld. Cover the bowl tightly with plastic wrap or transfer the salad to an airtight container. Refrigerate for at least 30 minutes, or preferably 1 to 2 hours. This chilling time is essential because it allows the flavors to meld together, the pasta to absorb the dressing, and the overall taste to deepen. Before serving, give the salad a final gentle toss. You can garnish with extra grated Parmesan cheese, fresh basil leaves, or a sprinkle of black pepper if desired. This Italian Pasta Salad is perfect as a standalone meal or as a flavorful side dish for grilled meats, fish, or alongside a hearty soup. Enjoy the delicious, refreshing taste of this classic dish!
Conclusion:
I hope you’re as excited to try this Italian Pasta Salad recipe as I am to share it with you! This dish is a true winner because it’s incredibly versatile, bursting with fresh flavors, and effortlessly elegant. It’s the perfect make-ahead meal, making it ideal for busy weeknights or impressive potluck contributions. The combination of perfectly cooked pasta, vibrant vegetables, and a zesty dressing is simply irresistible, offering a satisfying and refreshing taste in every bite.
Feel free to get creative with your serving suggestions! This Italian Pasta Salad is fantastic as a standalone light lunch, a delightful side dish to grilled meats or fish, or even as a hearty appetizer at your next gathering. For variations, consider adding in some grilled chicken or shrimp for a protein boost, or swapping out the vegetables for seasonal favorites like roasted bell peppers, cherry tomatoes, or even some artichoke hearts. Don’t be afraid to experiment with different types of pasta, like rotini, farfalle, or even a gluten-free option. I truly encourage you to give this recipe a whirl and discover your own favorite combinations!
Frequently Asked Questions:
Can I make this Italian Pasta Salad ahead of time?
Absolutely! This salad is actually best when made a few hours in advance, allowing all the flavors to meld together beautifully. You can prepare it up to a day ahead and store it covered in the refrigerator.
What kind of pasta works best for this recipe?
Sturdier pasta shapes that hold their shape well and can catch the dressing are ideal. I’ve found that rotini, farfalle (bow-tie pasta), penne, or even macaroni work wonderfully. Avoid very delicate or thin pastas that can become mushy.
How long will this Italian Pasta Salad last in the refrigerator?
Properly stored in an airtight container, this Italian Pasta Salad will stay fresh in the refrigerator for about 3-4 days. The vegetables will remain crisp, and the flavors will continue to deepen.
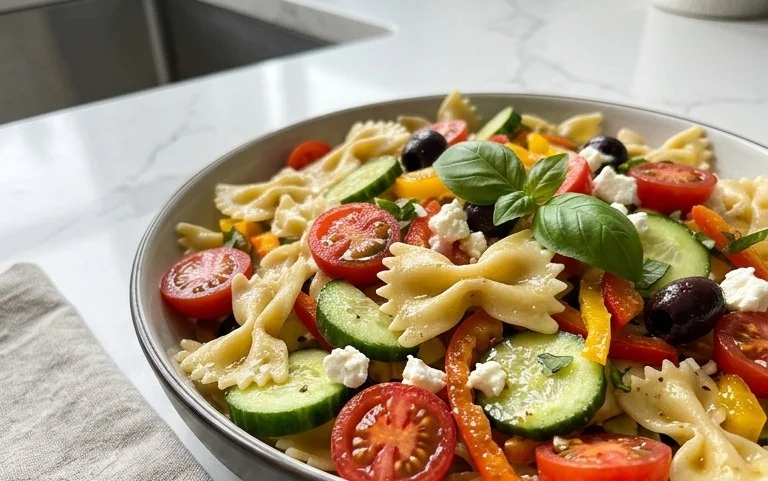
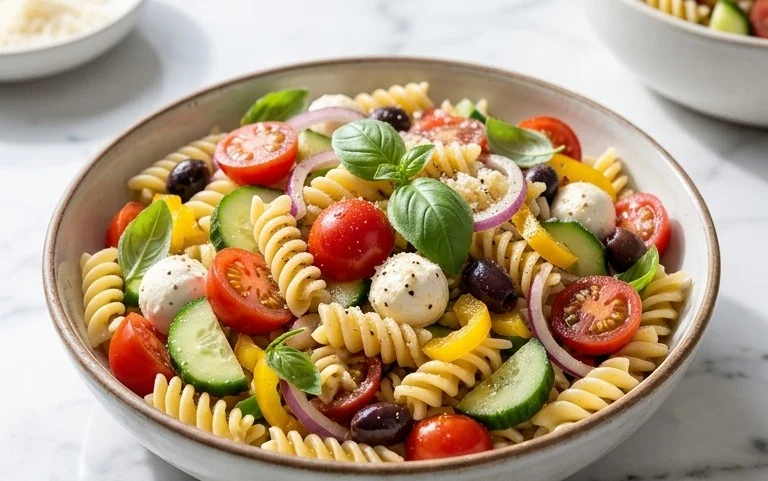
Italian Pasta Salad
A classic Italian pasta salad bursting with fresh vegetables, olives, cheese, and a zesty vinaigrette.
Ingredients
-
1 lb. fusilli pasta
-
1 (15-oz.) can chickpeas, drained and rinsed
-
1 pint cherry tomatoes, halved
-
1 cup thinly sliced mini sweet peppers
-
3/4 cup sliced pepperoncini peppers
-
3/4 cup pitted kalamata olives, halved
-
1 cup grated Parmesan cheese
-
3/4 cup small cubed provolone cheese
-
2 to 3 cups fresh baby spinach, roughly chopped
-
1/2 cup extra-virgin olive oil
-
1/4 cup red grape vinegar
-
2 Tbsp. pepperoncini brine
-
3 Tbsp. minced shallots
-
2 garlic cloves, minced
-
2 tsp. dried oregano
Instructions
-
Step 1
Cook fusilli pasta according to package directions until al dente. Drain and rinse with cold water to stop cooking and prevent sticking. Set aside. -
Step 2
In a large bowl, combine the cooked pasta, chickpeas, cherry tomatoes, mini sweet peppers, pepperoncini peppers, and kalamata olives. -
Step 3
In a separate small bowl, whisk together the extra-virgin olive oil, red grape vinegar, pepperoncini brine, minced shallots, minced garlic, and dried oregano to make the vinaigrette. -
Step 4
Pour the vinaigrette over the pasta and vegetable mixture. Add the grated Parmesan cheese and cubed provolone cheese. Toss gently to combine all ingredients. -
Step 5
Gently fold in the chopped baby spinach just before serving. The residual heat from the pasta will slightly wilt the spinach. -
Step 6
Taste and adjust seasoning if necessary. Chill for at least 30 minutes before serving to allow flavors to meld.
Important Information
Nutrition Facts (Per Serving)
It is important to consider this information as approximate and not to use it as definitive health advice.
Allergy Information
Please check ingredients for potential allergens and consult a health professional if in doubt.