Nut-Free Pesto Recipe – Delicious & Easy Alternative
Nut Free Pesto is a revelation for anyone who’s ever loved the vibrant, herbaceous goodness of classic pesto but had to sadly steer clear due to nut allergies or dietary preferences. We’ve all been there, right? That moment you taste a perfectly balanced pesto – the peppery bite of basil, the garlicky punch, the salty Parmesan – and wish you could share that joy without a second thought. Well, prepare to rejoice! This nut free pesto delivers all that incredible flavor and versatility, but with a brilliant twist that makes it accessible to so many more people. It’s incredibly easy to whip up, transforming simple ingredients into a culinary superstar that elevates pasta, sandwiches, grilled vegetables, and more. Get ready to discover your new go-to sauce!
Why You’ll Love This Nut Free Pesto
The Ultimate Allergy-Friendly Flavor Booster
This nut free pesto is a true game-changer. It’s the perfect example of how delicious, vibrant food can be inclusive. Forget the worry and embrace the flavor!
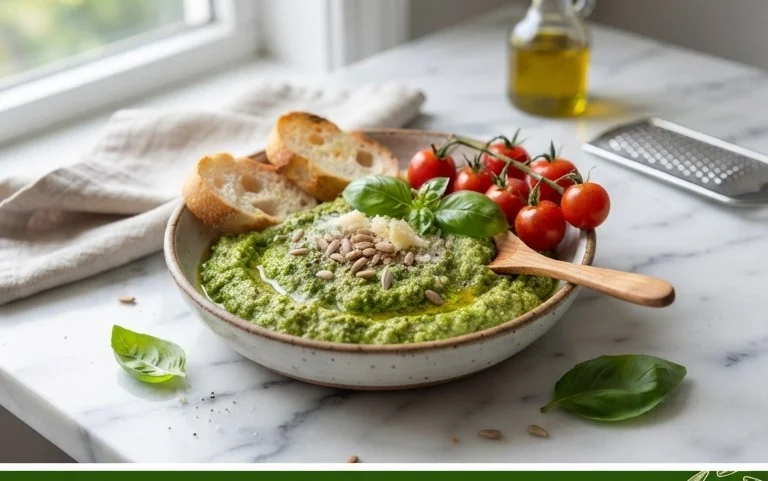
Nut-Free Pesto: A Creamy, Dreamy Sauce for Everyone
Pesto is a vibrant, herbaceous sauce that can elevate so many dishes, from pasta to sandwiches to roasted vegetables. Traditionally, pesto relies on pine nuts for its characteristic creamy texture and nutty flavor. However, for those with nut allergies or simply looking for a delicious alternative, a nut-free version is an absolute must-have. This recipe delivers all the bright, fresh flavors of classic pesto without any nuts, making it a safe and universally loved option for your kitchen.
The beauty of this nut-free pesto lies in its simplicity and the quality of its ingredients. We’re going to harness the power of fresh basil, pungent garlic, savory Parmesan, and good olive oil to create a sauce that is both complex and utterly satisfying. Unlike store-bought pestos, which can sometimes be a bit one-dimensional, making your own allows you to control the intensity of each flavor and achieve a perfectly balanced sauce. This is the kind of recipe that will become a staple, a go-to for adding instant deliciousness to weeknight meals or impressing guests at your next gathering.
Let’s talk about the star of the show: basil. Using fresh, vibrant basil is absolutely crucial for the best flavor. Look for bright green leaves that are free from wilting or dark spots. The aroma should be strong and sweet. If you have a garden, this is the perfect recipe to use your homegrown bounty. If not, visit your local farmers’ market or the produce aisle of your grocery store. Garlic, of course, adds that essential pungent kick that balances the sweetness of the basil. Parmesan cheese brings a salty, umami depth that is indispensable. And finally, the olive oil binds everything together, creating a silky smooth emulsion. The salt and pepper are there to fine-tune the flavors, bringin extractg out the best in every ingredient.
Ingredients:
Crafting Your Nut-Free Pesto: Step-by-Step
The process of making nut-free pesto is remarkably straightforward, especially if you have a food processor or a good quality blender. This makes it an ideal recipe for busy home cooks who want to whip up something special in minutes. The key is to process the ingredients until you reach your desired consistency – some prefer a chunkier pesto, while others enjoy a smoother, more emulsified sauce. I personally like a pesto that still has a little texture, so I’m careful not to over-process.
1. Begin extract by preparing your basil. Once you have your 2 cups of fresh basil leaves, you’ll want to make sure they are clean and dry. Gently wash the basil under cool water and then spin it dry in a salad spinner or pat it very thoroughly with paper towels. Excess water can dilute the flavor of your pesto and make it a bit watery, so this step is more important than it might seem. Remove the basil leaves from their stems; while some very tender stems might be okay, it’s generally best to stick to just the leaves for the smoothest texture and purest flavor.
2. Next, add the garlic to your food processor or blender. We’re using 2 garlic cloves here. For the best flavor and to ensure the garlic is fully incorporated without any large chunks, it’s a good idea to give them a rough chop before adding them to the machine. You can also add the garlic straight in if you have a powerful processor, but a quick rough chop is an easy way to ensure it breaks down nicely. Pulse the garlic a few times on its own to break it down further before adding the other ingredients. This helps prevent larger, raw-tasting pieces of garlic from dominating the pesto.
3. Now it’s time to add the basil and Parmesan cheese. Carefully pack the 2 cups of fresh basil leaves into the food processor or blender on top of the pulsed garlic. Then, add the 1/2 cup of freshly grated Parmesan cheese. Grating your own Parmesan cheese from a block will yield a much better flavor and texture than pre-grated cheese, which often contains anti-caking agents that can affect the smoothness of your pesto. Pulse the mixture a few times until the basil and cheese are roughly chopped and combined with the garlic. Scrape down the sides of the bowl as needed to ensure everything is incorporated evenly.
4. With the basil, garlic, and cheese combined, it’s time to introduce the olive oil. Slowly drizzle in the 1/4 cup of olive oil while the food processor or blender is running. This is where the magic happens, as the oil emulsifies with the other ingredients to create that classic pesto texture. Continue to process until the pesto reaches your desired consistency. If you prefer a looser pesto, you can add a tablespoon or two more olive oil. Conversely, if you want a thicker sauce, you can stop processing slightly earlier. Remember to taste and adjust as you go!
5. Finally, season your nut-free pesto to perfection. Add the 1/4 teaspoon of salt and 1/8 teaspoon of pepper to the pesto. Pulse a few more times to fully incorporate the seasonings. It’s important to taste the pesto at this stage and adjust the salt and pepper to your personal preference. The saltiness of the Parmesan can vary, so tasting is key. If it seems a little bland, a pinch more salt can make a world of difference. If you like a bit more heat, you can also add a touch more pepper. Once you’re happy with the flavor, your delicious nut-free pesto is ready to be enjoyed!
This nut-free pesto is incredibly versatile. Toss it with your favorite pasta, spread it on sandwiches or wraps, mix it into dips, or spoon it over grilled chicken or fish. It’s also fantastic with roasted vegetables like broccoli, asparagus, or potatoes. Store it in an airtight container in the refrigerator for up to a week, or freeze it in ice cube trays for individual portions that are easy to thaw and use. Enjoy the bright, fresh taste of homemade pesto, made accessible and delicious for everyone!
Conclusion:
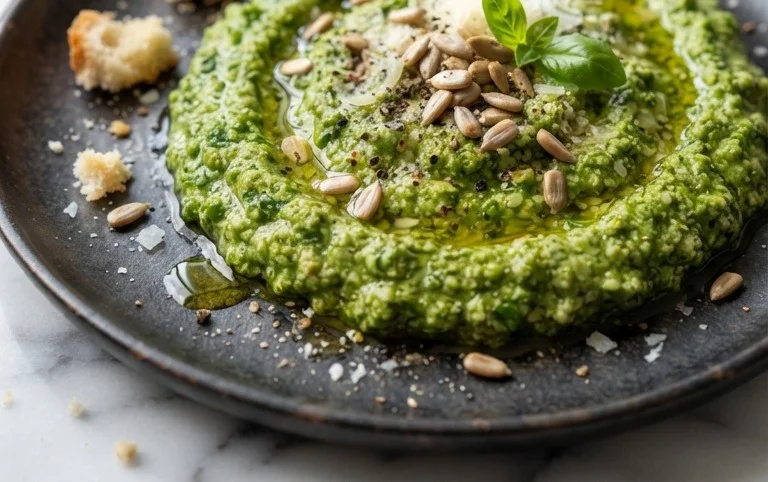
I hope you’ve enjoyed learning how to make this delicious nut free pesto! It truly is a game-changer for those with nut allergies or for anyone looking to try a fresh, vibrant alternative to traditional pesto. The beauty of this recipe lies in its simplicity and incredible versatility. It’s a fantastic way to add a burst of herbaceous flavor to so many dishes without any of the worry. Whether you’re serving it to guests with dietary restrictions or just want to expand your culinary horizons, this nut free pesto is sure to be a hit.
Serving suggestions are endless! Toss it with your favorite pasta for a quick and satisfying meal, spread it on crusty bread for an appetizer, or use it as a flavorful topping for grilled chicken, fish, or roasted vegetables. Don’t be afraid to experiment with it as a sandwich spread or even mixed into a creamy dip.
And the variations! You can adjust the herbs to your liking – consider adding a touch of mint for a refreshing twist, or perhaps some chives for a milder oniony flavor. Feel free to play with the type of oil you use, like a robust olive oil or even a lighter grapeseed oil. So please, give this recipe a try! I’m confident you’ll love how easy it is to create and how delicious it tastes.
Frequently Asked Questions:
Can I freeze this nut free pesto?
Absolutely! This nut free pesto freezes beautifully. Spoon it into ice cube trays and freeze until solid, then transfer the frozen pesto cubes to a freezer-safe bag or container. This makes it easy to thaw out just the right amount for your cooking needs. It should stay fresh in the freezer for up to 3 months.
What can I use instead of pine nuts if I don’t have them for a traditional pesto, even though this is nut free?
While this recipe is specifically nut free, for a general pesto variation, sunflower seeds or pepitas (pumpkin seeds) are excellent substitutes for pine nuts, offering a similar texture and richness. However, for this nut free pesto, we’re focusing on seed-free or alternative bases like roasted garlic or even a bit of cooked cauliflower for creaminess. Always ensure any ingredient you introduce is safe for your specific dietary needs.
Nut Free Pesto
A classic basil pesto recipe, made without nuts for those with allergies.
Ingredients
-
2 cups fresh basil
-
2 garlic cloves
-
1/2 cup freshly grated Parmesan cheese
-
1/4 cup olive oil
-
1/4 teaspoon salt
-
1/8 teaspoon pepper
Instructions
-
Step 1
Combine basil, garlic, Parmesan cheese, salt, and pepper in a food processor. -
Step 2
Pulse until ingredients are finely chopped. -
Step 3
With the food processor running, slowly drizzle in the olive oil. -
Step 4
Continue to process until the pesto is smooth and well combined. -
Step 5
Taste and adjust seasoning if needed. -
Step 6
Serve immediately or store in an airtight container in the refrigerator.
Important Information
Nutrition Facts (Per Serving)
It is important to consider this information as approximate and not to use it as definitive health advice.
Allergy Information
Please check ingredients for potential allergens and consult a health professional if in doubt.