Easy Fried Pickle Dip – Dairy-Free Option
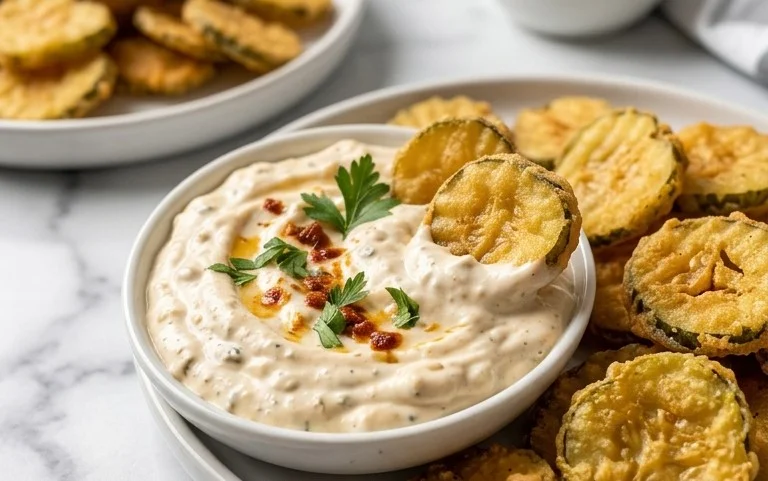
Easy Fried Pickle Dip is about to become your new obsession. Forget everything you thought you knew about dips, because this tangy, creamy, and utterly irresistible creation is here to change the game. We all know and love the satisfying crunch of a perfectly fried pickle, but imagin extracte that delightful flavor infused into a luscious, dippable concoction? That’s exactly what this recipe delivers. It’s the ultimate crowd-pleaser, perfect for game nights, casual get-togethers, or just when you’re craving something uniquely delicious. What truly sets this easy fried pickle dip apart is its incredible balance of savory dill, a hint of spice, and a creamy base that perfectly complements the briny pickle goodness. And the best part? I’ve got a fantastic dairy-free option so absolutely everyone can join in on the fun. Get ready to dip, scoop, and devour this sensational treat!
Ingredients:
This Easy Fried Pickle Dip is an absolute crowd-pleaser, and the best part is how incredibly simple it is to whip up. Whether you’re hosting a game day party, a casual get-together, or just craving something delightfully tangy and creamy, this dip has you covered. It captures all the irresistible flavors of fried pickles without any of the fuss. And for those navigating dairy-free options, I’ve made sure to include easy swaps so everyone can enjoy this treat. Let’s get started!
Cooking Instructions:
Step 1: Preparing the Creamy Base
First things first, let’s build the luscious foundation of our dip. In a medium-sized mixing bowl, combine the sour cream and the cream cheese. If you’re opting for the dairy-free version, now’s the time to introduce your chosen dairy-free sour cream and cream cheese alternatives. I personally love using Kite Hill cream cheese for its smooth texture and neutral flavor profile. It’s important that your cream cheese is softened to room temperature. This will make it significantly easier to mix and prevent any lumps, ensuring a uniformly creamy dip. You can leave it out on the counter for about an hour before you plan to start making the dip, or you can speed up the process by cutting it into smaller cubes and letting it sit for about 20-30 minutes. Once you have your sour cream and cream cheese (or their dairy-free counterparts) in the bowl, use a sturdy spoon or a hand mixer on a low setting to blend them together until they are completely smooth and well combined. There should be no visible streaks of cream cheese or sour cream. This smooth, creamy base is what will carry all those amazing pickle flavors.
Step 2: Infusing the Pickle Punch
Now comes the star of the show – the pickles! Take your cup of dill pickles and chop them very finely. The smaller the pieces, the better they will distribute throughout the dip and the more evenly the flavor will come through. You want to get that distinct pickle bite in every spoonful. Add the chopped pickles directly into the bowl with the cream cheese and sour cream mixture. Next, we’ll add the pickle juice. This is crucial for intensifying the pickle flavor and adding a delightful tang. Pour in your 2 tablespoons of pickle juice. Then, stir in the Worcestershire sauce. Worcestershire sauce might seem a bit unexpected, but it adds a wonderful umami depth that complements the tangin extractess of the pickles beautifully. Give everything a good stir to ensure all these ingredients are evenly incorporated into the creamy base.
Step 3: Adding the Aromatics and Seasonings
To elevate our dip from merely good to absolutely fantastic, we’re going to add a medley of aromatic and savory seasonings. Finely chop your fresh dill and add it to the bowl. Fresh dill is key here; it brings a bright, herbaceous note that cuts through the richness of the dip. Next, sprinkle in the garlic powder and onion powder. These pantry staples are essential for adding that classic savory flavor profile. Now for the ranch seasoning. If you’re using a store-bought version, make sure it’s dairy-free if that’s a requirement for you. I often make my own ranch seasoning blend, which allows me to control the ingredients precisely. Add your 2 tablespoons of ranch seasoning. Finally, season with salt to taste. Start with a small pinch, stir, and then taste. Remember that pickles and ranch seasoning can already be quite salty, so it’s best to season gradually. Stir everything together thoroughly until all the seasonings are evenly distributed. At this point, your dip should be smelling incredible!
Step 4: Chilling and Marinating
Before we move on to the crunchy topping, it’s important to let our flavors meld. Cover the bowl tightly with plastic wrap or a lid and refrigerate the dip for at least 30 minutes. This chilling period is not just about cooling the dip down; it’s about allowing all those wonderful flavors – the tangy pickles, the savory seasonings, and the creamy base – to harmonize and deepen. The longer it chills, the more intense and well-rounded the flavor will become. I usually like to let it chill for at least an hour, and if I have the time, even a couple of hours makes a noticeable difference. This step is a game-changer for the overall taste of the dip, so please don’t skip it!
Step 5: Creating the Crispy Topping
This is the final flourish that makes our dip truly special and reminiscent of fried pickles. In a small skillet, melt the 1 tablespoon of butter over medium heat. If you’re using a dairy-free butter substitute, follow the same instructions. Once the butter is melted and shimmering, add the 3/4 cup of Panko breadcrum extractbs. Stir the Panko breadcrum extractbs constantly to ensure they toast evenly and don’t burn. You want them to become golden brown and wonderfully crispy. This should take about 3-5 minutes. Keep a close eye on them as they can go from perfectly toasted to burnt very quickly. Once they are golden and fragrant, immediately remove the skillet from the heat. Let the toasted breadcrum extractbs cool for a few minutes. Once the dip has finished chilling, spoon it into your serving dish. Just before serving, generously sprinkle the toasted Panko breadcrum extractbs over the top of the dip. This crunchy topping adds a fantastic textural contrast to the creamy dip and provides that satisfying crunch we all love in fried pickles. Serve immediately with your favorite dippers, such as tortilla chips, crackers, or vegetable sticks. Enjoy every delicious bite!
Conclusion:
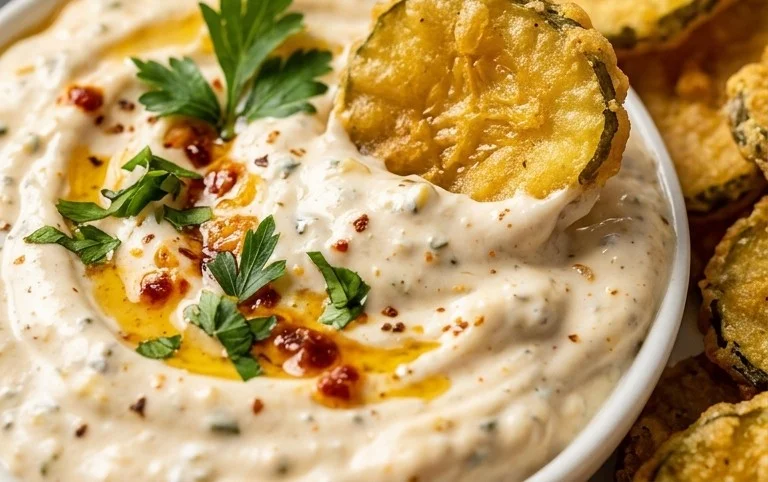
I hope you’re as excited about this Easy Fried Pickle Dip as I am! This recipe is a winner because it’s incredibly simple to whip up, bursting with that irresistible tangy and savory flavor profile that fried pickles are known for, and it offers a fantastic dairy-free option, making it accessible to more people. Whether you’re hosting a game day party, a casual get-together, or just craving a delicious snack, this dip is sure to be a crowd-pleaser. Its creamy texture and zesty kick make it perfect for dipping everything from tortilla chips and crackers to fresh vegetables.
Don’t be afraid to get creative with variations! You can adjust the spice level by adding a pinch of cayenne pepper or a dash of hot sauce. For an extra layer of flavor, consider adding a bit of smoked paprika or garlic powder. The beauty of this dip is its adaptability. I truly encourage you to give this easy fried pickle dip a try; you won’t be disappointed!
Frequently Asked Questions:
Can I make this dip ahead of time?
Yes, you absolutely can! You can prepare the dip up to 24 hours in advance. Store it in an airtight container in the refrigerator. You might need to give it a good stir before serving, as it can thicken slightly. If it becomes too thick, a tablespoon or two of extra dairy-free milk or mayonnaise can help loosen it up.
What are some good substitutes for dill pickles?
While dill pickles are classic, you can experiment! Bread and butter pickles will lend a sweeter, more subtle flavor to the dip. For a spicier kick, try using spicy pickles. Just ensure they are well-drained before chopping to avoid making the dip too watery.
How can I make the dairy-free version even creamier?
For an extra creamy dairy-free fried pickle dip, ensure your dairy-free mayonnaise is a high-quality, full-fat version. You can also experiment with adding a tablespoon or two of unsweetened dairy-free cream cheese or a dollop of dairy-free sour cream alternative to the base. This will enhance the richness and overall texture.
Easy Fried Pickle Dip (Dairy-Free Option)
A creamy and tangy dip perfect for parties, with an easy dairy-free option. Features chopped pickles, dill, and a touch of spice.
Ingredients
-
16 oz container sour cream (can sub dairy free )
-
10 oz cream cheese (can sub dairy free (I use Kite Hill))
-
1 cup dill pickles (chopped )
-
2 tbsp pickle juice
-
1 tbsp Worcestershire sauce
-
2-3 tbsp fresh dill
-
1/2 tsp garlic powder
-
1/4 tsp onion powder
-
2 tbsp ranch seasoning (my homemade seasoning has a df option)
-
salt to taste
-
3/4 cup Panko breadcrumbs
-
1 tbsp butter (or dairy-free butter)
Instructions
-
Step 1
In a medium bowl, combine sour cream and cream cheese (or their dairy-free alternatives) until smooth. -
Step 2
Stir in chopped dill pickles, pickle juice, Worcestershire sauce, fresh dill, garlic powder, onion powder, and ranch seasoning. -
Step 3
Season with salt to taste. -
Step 4
In a separate small skillet, melt butter (or dairy-free butter) over medium heat. Add Panko breadcrumbs and toast until golden brown and crispy, stirring frequently. Remove from heat. -
Step 5
Spoon the dip into a serving dish and top generously with the toasted Panko breadcrumbs. -
Step 6
Serve immediately or chill for at least 30 minutes to allow flavors to meld.
Important Information
Nutrition Facts (Per Serving)
It is important to consider this information as approximate and not to use it as definitive health advice.
Allergy Information
Please check ingredients for potential allergens and consult a health professional if in doubt.