Easy Homemade Fruit Leather Recipe – Healthy Snack
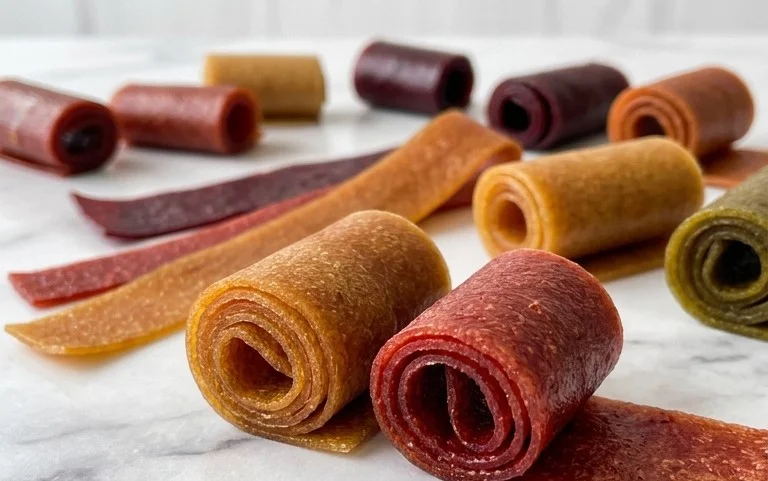
Homemade Fruit Leather Recipe: Embark on a delightful culinary adventure that’s as vibrant and fun to make as it is to eat! Who doesn’t love that intensely fruity, chewy, and satisfying bite of fruit leather? It’s a nostalgic treat that instantly transports us back to carefree days, but it’s also incredibly versatile. Forget those store-bought versions loaded with artificial flavors and sugars; making your own homemade fruit leather allows you to control every ingredient, transforming ripe, seasonal fruits into pure, unadulterated deliciousness. Imagin extracte the sweet tang of berries, the tropical zest of mango, or the comforting notes of apple and cinnamon, all concentrated into a delightfully pliable sheet. What truly makes this homemade fruit leather recipe special is the simplicity and the pure, wholesome goodness that shines through. It’s a fantastic way to use up excess fruit and create a healthy snack that the whole family will adore. Get ready to create sunshine in every chew!
Homemade Fruit Leather Recipe
There’s something incredibly satisfying about making your own snacks, and fruit leather is one of the easiest and most rewarding. It’s a wonderfully healthy alternative to store-bought gummy treats, packed with the natural sweetness and goodness of real fruit. Plus, it’s a fantastic way to use up any surplus fruit you might have. The process is simple, requiring just a few ingredients and a little patience. The result? A chewy, vibrant, and intensely flavored treat that kids and adults alike will adore. Let’s get started on creating your own delicious homemade fruit leather!
Ingredients:
Preparing Your Fruit Base
The first step to creating fantastic fruit leather is choosing and preparing your fruit. You can use virtually any fruit you like – berries, peaches, mangoes, apples, plums, or even a combination! For this recipe, we’re aiming for about 2 cups of chopped fruit. If you’re using frozen fruit, make sure it’s thawed and any excess liquid has been drained off. For fruits like apples or pears, you’ll want to peel, core, and chop them into manageable pieces. If your fruit is particularly juicy, like ripe berries, you might find you need slightly less added sugar. The lemon juice is crucial; it not only adds a bright, tangy counterpoint to the sweetness of the fruit but also acts as a natural preservative and helps the fruit maintain its vibrant color.
Cooking the Fruit Puree
Once your fruit is prepped, it’s time to get cooking. You’ll want to combine your chopped fruit, white sugar, and lemon juice in a saucepan. The sugar might seem like a lot, but remember that fruit leather is meant to be sweet, and the sugar also helps with preservation and achieving that desirable chewy texture. I like to use a medium saucepan to give the fruit plenty of room to cook down. Place the saucepan over medium heat. Stir the ingredients together well, ensuring the sugar starts to dissolve.
Now, it’s time to cook the fruit until it softens and breaks down. This usually takes about 10-15 minutes. You’ll see the fruit begin extract to release its juices and the mixture will start to thicken. Stir occasionally to prevent sticking, especially as the mixture becomes thicker. If you’re using firmer fruits like apples, you might want to add a tablespoon or two of water to the pan initially to help them soften more easily. The goal here is to create a very soft, jam-like consistency. Don’t rush this step; allowing the fruit to cook down properly will result in a smoother puree and a better texture for your fruit leather.
Pureeing the Cooked Fruit
Once the fruit has softened beautifully and is easily mashable, it’s time to create a smooth puree. You can do this in a couple of ways, depending on what you have in your kitchen. The most common and effective method is to use an immersion blender directly in the saucepan. This is my preferred method because it’s quick and minimizes the dishes you have to wash. Carefully submerge the immersion blender into the cooked fruit and blend until you have a very smooth consistency. If you don’t have an immersion blender, you can carefully transfer the hot fruit mixture to a regular blender or a food processor and blend until smooth. Be cautious when blending hot liquids; fill the blender only about halfway and hold the lid down firmly with a kitchen towel. If the mixture is still too thick to blend easily, you can add a tablespoon of water at a time until it reaches the desired consistency. The smoother your puree, the more appealing your fruit leather will be.
Spreading and Baking the Fruit Leather
This is where your fruit leather starts to take shape! Preheat your oven to the lowest possible temperature, typically around 170°F (75°C). This low and slow method is key to drying the fruit leather without cooking it further or burning it. Line a baking sheet with parchment paper or a silicone baking mat. It’s crucial to use a material that won’t stick, as removing the fruit leather can be tricky otherwise. Pour your fruit puree onto the prepared baking sheet. You want to spread it as thinly and evenly as possible. A good thickness is usually around 1/8 to 1/4 inch. Use a spatula or the back of a spoon to get it as uniform as you can. A thinner layer will bake faster, while a thicker layer will take longer. If you want to make multiple flavors or colors, you can divide the puree onto separate baking sheets.
Place the baking sheet in the preheated oven. The drying time can vary significantly depending on the thickness of your fruit leather, the humidity in your kitchen, and the actual temperature of your oven. It can take anywhere from 4 to 10 hours, or even longer. You’ll want to check on it periodically, especially after the first few hours. The fruit leather is ready when it’s no longer sticky to the touch and peels easily away from the parchment paper. It should be pliable and slightly leathery, not brittle or gooey. If you notice any areas browning too quickly, you can carefully remove the baking sheet and allow those areas to catch up.
Cooling and Cutting Your Fruit Leather
Once your fruit leather is fully dried and has that perfect pliable texture, it’s time to let it cool completely. Carefully remove the baking sheet from the oven. Allow the fruit leather to cool on the baking sheet for about 30 minutes. This will help it firm up a bit more. After it has cooled slightly, you can then peel the entire sheet of fruit leather off the parchment paper. This is often the most satisfying moment! Lay the large sheet of fruit leather flat on a clean cutting board or your countertop.
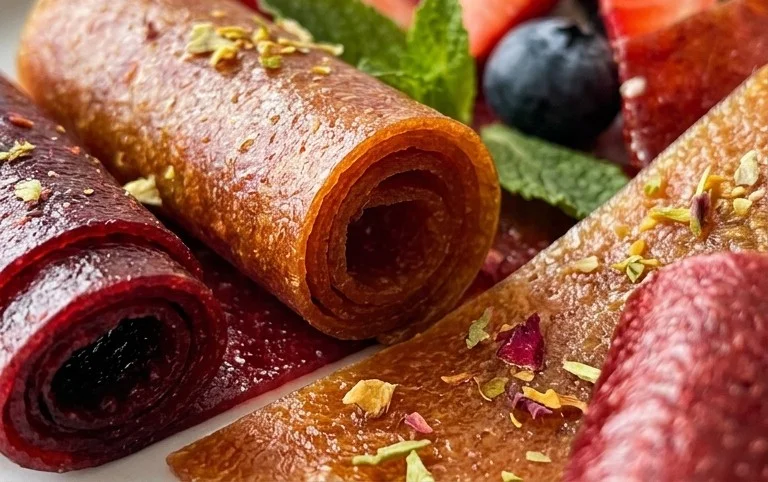
Now comes the fun part: cutting your fruit leather into strips or fun shapes. You can use a sharp knife or a pizza cutter to slice it into strips of your desired width. For kids, cookie cutters can also be a fun way to create shapes. If you want to store it long-term, you can roll up the strips. To prevent them from sticking together, you can sprinkle a tiny bit of cornstarch or powdered sugar between layers, or roll them in parchment paper. Homemade fruit leather is best stored in an airtight container at room temperature for a week or two, or in the refrigerator for longer storage. Enjoy your delicious, healthy, homemade creation!
Conclusion:
Making your own fruit leather is an incredibly rewarding and surprisingly simple process. It’s a fantastic way to preserve the vibrant flavors of fresh fruit, offering a healthier and more delicious alternative to store-bought snacks. This homemade fruit leather recipe is perfect for using up seasonal produce, and the results are always a delightful chewy treat that everyone, from kids to adults, will adore. The concentrated fruit flavor is pure sunshine in every bite!
I love serving fruit leather as a sweet treat after dinner, packed into lunchboxes for a school snack, or even as a unique addition to a cheese board. The possibilities are truly endless!
Don’t be afraid to get creative with your fruit choices. You can stick to a single fruit like strawberries or apples, or embark on delicious flavor combinations. Think mango-peach, raspberry-lime, or even a spiced apple-cinnamon leather. The beauty of making it yourself is complete control over the ingredients and flavors. So please, give this homemade fruit leather recipe a try – I promise you won’t regret the fresh, homemade goodness!
Frequently Asked Questions:
Why did my fruit leather not set properly?
This can happen for a few reasons. Ensure you’ve cooked the fruit down enough to reduce the water content significantly. Over-stirring can also introduce too much air, making it difficult to dry. Finally, check your oven temperature and drying time; it might need a bit longer at a very low heat setting.
Can I make fruit leather without a dehydrator?
Absolutely! As demonstrated in the recipe, your oven on its lowest setting (usually around 170°F or 75°C) works wonderfully. Just make sure to prop the oven door open slightly to allow moisture to escape.
How long does homemade fruit leather last?
When stored properly in an airtight container at room temperature, your homemade fruit leather can last for several weeks. For longer storage, you can also keep it in the refrigerator or freezer, though the texture might change slightly upon thawing.
Homemade Fruit Leather
A simple and delicious recipe for making homemade fruit leather with just a few ingredients.
Ingredients
-
2 cups fruit, chopped
-
3 tbsp white sugar
-
½ whole lemon, just the juice
-
1 cup water
-
1 tsp vanilla extract
-
Pinch of salt
Instructions
-
Step 1
Combine chopped fruit, sugar, lemon juice, water, vanilla extract, and salt in a saucepan. -
Step 2
Cook over medium heat, stirring occasionally, until the fruit is very soft and begins to break down. -
Step 3
Carefully transfer the mixture to a blender or food processor and blend until smooth. -
Step 4
Pour the puree onto a baking sheet lined with parchment paper or a silicone baking mat, spreading it thinly and evenly. -
Step 5
Bake in a preheated oven at 170°F (77°C) for 4-6 hours, or until the fruit leather is no longer sticky to the touch. -
Step 6
Let cool completely, then peel off the parchment paper and cut into strips.
Important Information
Nutrition Facts (Per Serving)
It is important to consider this information as approximate and not to use it as definitive health advice.
Allergy Information
Please check ingredients for potential allergens and consult a health professional if in doubt.