Best Crispy Chicken Fried Chicken Recipe
Chicken Fried Chicken. Just the name itself conjures up images of crispy, golden-brown perfection, doesn’t it? It’s a dish that screams comfort food, a culinary hug on a plate that has captured hearts and stomachs for generations. There’s something undeniably magical about that tender chicken breast, enveloped in a crunchy, seasoned crust, and swimming in a creamy, peppery gravy. It’s more than just a meal; it’s an experience. What makes Chicken Fried Chicken so universally beloved? It’s the incredible contrast in textures – the satisfying crunch giving way to juicy, flavorful chicken. It’s the rich, savory gravy that ties everything together with a delightful tang. This isn’t just fried chicken; it’s an elevated version, a true Southern classic that deserves a spot on your table. Get ready to make the best Chicken Fried Chicken you’ve ever tasted!
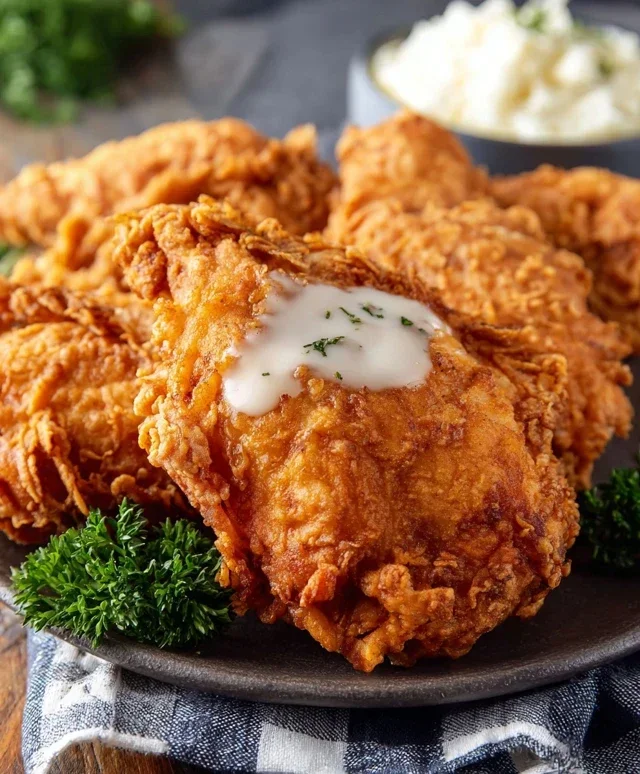
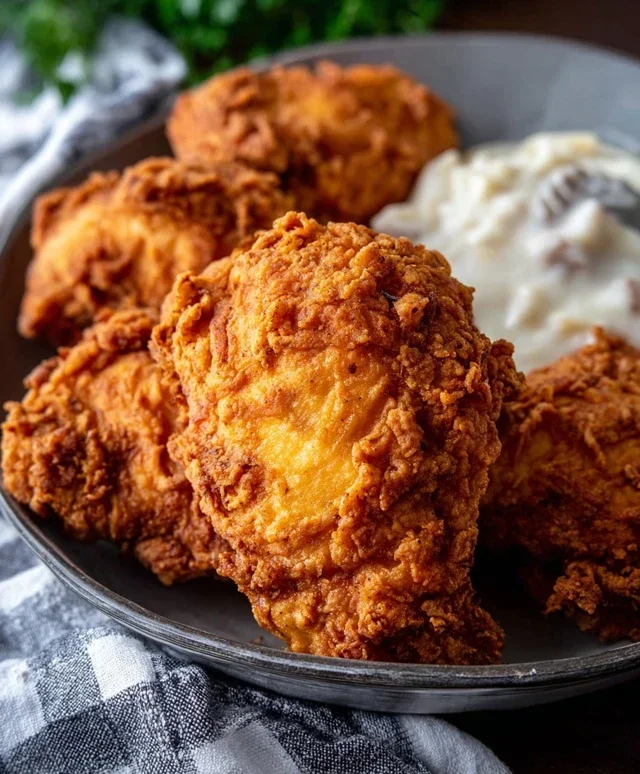
Chicken Fried Chicken
Get ready for a culinary adventure that’s sure to become a family favorite! Chicken Fried Chicken is a dish that embodies comfort food at its finest. Imagin extracte tender, juicy chicken coated in a crispy, golden-brown crust, all smothered in a creamy, dreamy gravy. This isn’t just a meal; it’s an experience. We’re going to walk through this step-by-step, so even if you’re new to frying, you’ll end up with spectacular results. The secret lies in a few key techniques that ensure a perfectly cooked chicken and a velvety smooth gravy. Let’s dive in and create some deliciousness!
Ingredients:
Preparing the Chicken and Dredgin extractg Station
First things first, let’s get our chicken prepped and ready for its glorious transformation. Take your thin-sliced chicken breasts and pat them thoroughly dry with paper towels. This is a crucial step for achieving that extra crispy coating. Moisture is the enemy of crispiness! Next, we’re going to set up our dredgin extractg station. In a shallow dish or a large resealable bag, combine 2 cups of flour, 2 teaspoons of baking powder, 1 teaspoon of baking soda, 1 teaspoon of salt, 1 teaspoon of pepper, and 1 teaspoon of garlic powder. Whisk or shake this mixture until it’s well combined. This is where all the flavor and crispiness will come from! In a separate shallow dish, whisk together 1 ½ cups of buttermilk, 1 egg, and 1 tablespoon of hot sauce. The buttermilk tenderizes the chicken and adds a slight tang, while the egg helps the coating adhere. The hot sauce, while not making the chicken spicy, adds a depth of flavor that you won’t be able to quite pinpoint but will definitely notice.
The Crispy Coating Process
Now for the magic that makes our chicken irresistible. Take each piece of dried chicken and first dip it into the buttermilk mixture, ensuring it’s fully coated. Let any excess drip off for a moment. Then, place the buttermilk-coated chicken into the seasoned flour mixture. Press down gently to ensure the flour adheres well to all sides. You want a nice, thick, even coating. For an extra-crispy crust, you can double-dip: after the first flour coating, dip the chicken back into the buttermilk mixture and then back into the flour. This creates little craggy bits that fry up beautifully. Once coated, place the chicken pieces on a wire rack set over a baking sheet. This allows the coating to set slightly, which will help it stick better during frying. Let the coated chicken rest for about 10-15 minutes while you heat your oil. This resting period is another important step for a successful coating that won’t fall off in the fryer.
Frying the Chicken to Golden Perfection
It’s time to get frying! Pour enough oil into a large, heavy-bottomed skillet or Dutch oven to come about 1 to 1 ½ inches up the sides. You want enough oil so the chicken pieces are partially submerged. Heat the oil over medium-high heat until it reaches about 350°F (175°C). If you don’t have a thermometer, you can test the oil by dropping a tiny bit of the flour mixture into it. It should sizzle immediately and float to the surface. Carefully place 2-3 chicken pieces into the hot oil, making sure not to overcrowd the pan. Overcrowding will lower the oil temperature, resulting in soggy, greasy chicken. Fry the chicken for about 4-6 minutes per side, or until it’s golden brown and cooked through. The internal temperature should reach 165°F (74°C). Use tongs to carefully turn the chicken and monitor its browning. Once cooked, remove the chicken from the oil and place it on a clean wire rack set over a baking sheet to drain. This is much better than paper towels, as it allows air to circulate and keeps the bottom from getting soggy. Repeat the frying process with the remaining chicken.
Making the Creamy Pan Gravy
While our chicken is resting and staying warm, let’s whip up the luscious gravy that will tie this whole meal together. Carefully pour out about ¼ cup of the used frying oil into a heatproof bowl, leaving the rest in the skillet. Return the skillet with the reserved ¼ cup of oil to medium heat. Whisk in ⅓ cup of flour until it forms a smooth paste, often called a roux. Cook this roux for about 1-2 minutes, stirring constantly, until it’s lightly golden. This cooks out the raw flour taste. Gradually whisk in 2 cups of milk, a little at a time, ensuring there are no lumps. Continue to whisk constantly as the gravy thickens. Bring the gravy to a gentle simmer and let it cook for about 5-8 minutes, stirring occasionally, until it reaches your desired consistency. Season generously with salt and pepper to taste. Taste and adjust as needed – this is your chance to make it perfect!
Serving Your Masterpiece
Once your gravy is smooth and wonderfully thick, it’s time to assemble your magnificent Chicken Fried Chicken. Arrange the perfectly fried, golden chicken pieces on serving plates. Spoon generous amounts of the hot, creamy gravy over the chicken. This gravy is so good, you’ll want to get every last drop on your plate! Serve immediately with your favorite Southern sides like mashed potatoes, collard greens, or biscuits. The contrast between the incredibly crispy chicken and the smooth, rich gravy is simply divine. Enjoy every delicious bite of this classic comfort food!
Conclusion:
There you have it! We’ve walked through the steps to create a truly spectacular Chicken Fried Chicken that’s crispy on the outside, incredibly juicy on the inside, and bursting with flavor. This recipe is a winner because it delivers that classic comfort food experience that everyone loves. The golden-brown, perfectly seasoned crust is a delight, and the tender chicken beneath makes every bite a dream. It’s the kind of meal that brings smiles to the table and leaves everyone asking for seconds.
Serving this delicious Chicken Fried Chicken is an event in itself. It pairs wonderfully with creamy mashed potatoes and gravy, a vibrant green bean casserole, or a refreshing coleslaw for a balanced meal. For a truly indulgent experience, don’t forget a side of buttermilk biscuits to soak up any extra gravy! Don’t be afraid to experiment with variations, either. You could add a pinch of smoked paprika to your flour mixture for a smoky undertone, or even a touch of cayenne for a little heat. Give it a try – I promise you won’t be disappointed!
Frequently Asked Questions:
Can I make the breading extra crispy?
Absolutely! For an extra crispy coating, try double-dipping your chicken pieces. After the initial dredge in flour, dip them in the egg wash again, then back into the seasoned flour. This creates a thicker, crunchier crust.
What’s the best oil to use for frying?
A neutral oil with a high smoke point is ideal. Vegetable oil, canola oil, or peanut oil are excellent choices for achieving that perfect golden fry without burning.
Can I reheat leftover Chicken Fried Chicken?
Yes, you can! The best way to reheat is in an oven or toaster oven at around 350°F (175°C) for 10-15 minutes, or until heated through. This helps to crisp up the breading again. Microwaving can make it soggy.
Chicken Fried Chicken
A classic comfort food featuring crispy, pan-fried chicken served with a creamy milk gravy.
Ingredients
-
6-8 thin sliced chicken breasts
-
2 cups flour
-
2 tsp baking powder
-
1 tsp baking soda
-
1 tsp salt
-
1 tsp pepper
-
1 tsp garlic powder
-
1 1/2 cup buttermilk
-
1 egg
-
1 Tbs hot sauce
-
Oil for frying
-
1/4 cup reserved oil from frying
-
1/3 cup flour
-
2 cup milk
-
Salt & pepper
Instructions
-
Step 1
In a shallow dish, whisk together 2 cups flour, baking powder, baking soda, salt, pepper, and garlic powder. -
Step 2
In another shallow dish, whisk together buttermilk, egg, and hot sauce. Dip each chicken breast into the buttermilk mixture, then dredge it in the flour mixture, ensuring it’s well coated. Set aside. -
Step 3
Heat about 1 inch of oil in a large, heavy skillet over medium-high heat until shimmering. Carefully place chicken pieces in the hot oil, working in batches if necessary to avoid overcrowding. Fry for 4-6 minutes per side, or until golden brown and cooked through. -
Step 4
Remove fried chicken from the skillet and drain on paper towels. Reserve 1/4 cup of the frying oil in the skillet, discarding the rest. -
Step 5
Return the skillet with the reserved oil to medium heat. Whisk in 1/3 cup flour to create a roux. Cook for 1-2 minutes, stirring constantly, until lightly browned. -
Step 6
Gradually whisk in 2 cups milk until smooth. Bring to a simmer, stirring, and cook until the gravy has thickened. Season with salt and pepper to taste. -
Step 7
Serve the chicken fried chicken hot, generously topped with the milk gravy.
Important Information
Nutrition Facts (Per Serving)
It is important to consider this information as approximate and not to use it as definitive health advice.
Allergy Information
Please check ingredients for potential allergens and consult a health professional if in doubt.