Cherry Pie Bombs- Delicious No-Bake Treats
Cherry Pie Bombs are about to become your new obsession, and for good reason! Forget everything you think you know about traditional cherry pie; these delightful little morsels take the classic flavors we all adore and transform them into a portable, perfectly portioned, and utterly irresistible treat. Imagin extracte the burst of sweet-tart cherry filling encased in a flaky, buttery crust, all baked to golden perfection. It’s the quintessential taste of summer, the comforting embrace of home baking, and a showstopper that’s surprisingly easy to whip up. What makes Cherry Pie Bombs so special? It’s their enchanting simplicity coupled with an explosion of flavor that’s both familiar and excitingly new. They’re perfect for parties, a sweet afternoon pick-me-up, or whenever that craving for something truly delicious strikes. Get ready to fall head over heels for these miniature marvels!
Cherry Pie Bombs
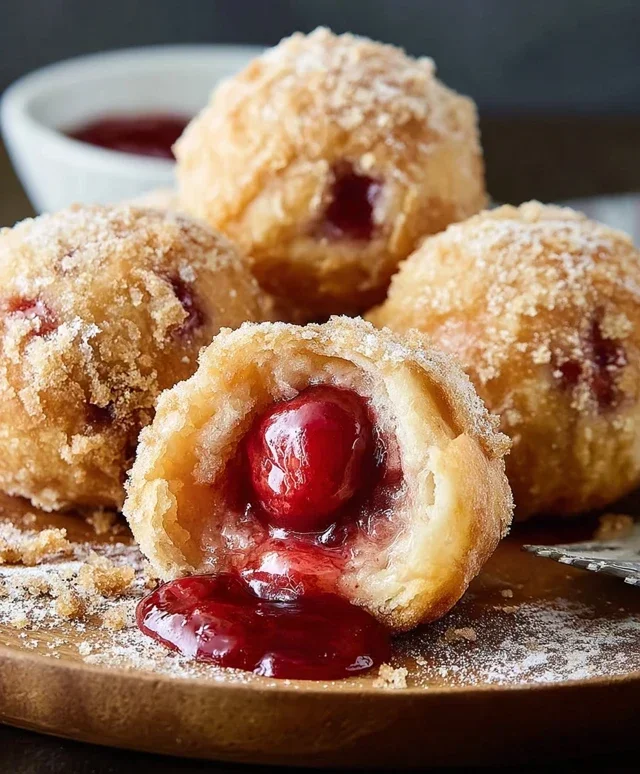
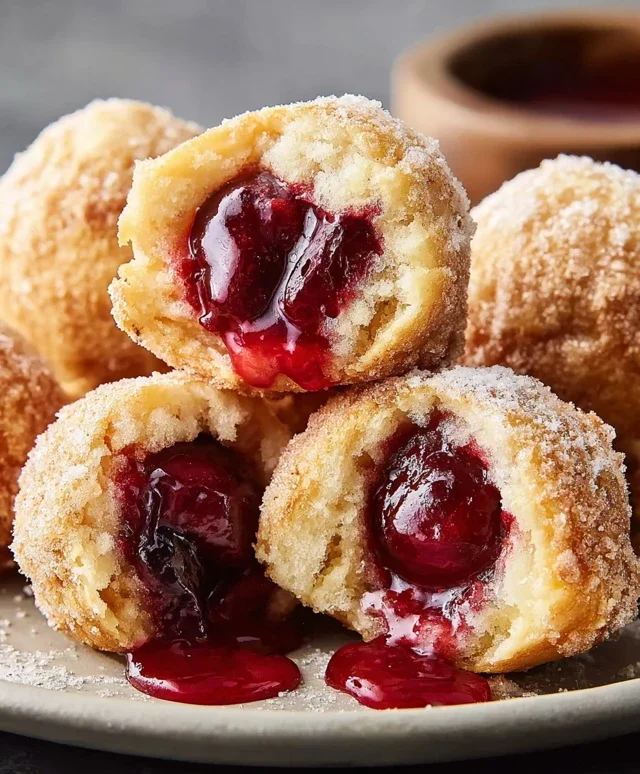
Get ready to experience a burst of sweet, cherry goodness with these incredible Cherry Pie Bombs! These delightful treats are a fun and easy way to enjoy all the classic flavors of cherry pie in a bite-sized, fried package. They’re perfect for parties, potlucks, or just a special indulgence for yourself. The crispy, golden exterior gives way to a warm, gooey cherry filling, all topped with a sweet, simple glaze. You won’t be able to stop at just one!
Ingredients:
Cooking Instructions
Let’s get started on creating these little pockets of joy!
Preparing the Biscuits
The foundation of our Cherry Pie Bombs starts with those wonderfully flaky Grands biscuits. Open the can carefully, following the instructions on the packagin extractg – those things can pop! Gently separate each biscuit. We want to work with them while they’re still a bit cool. Take one biscuit and flatten it out with your hands. You don’t need to be too precise here; we’re aiming for a general disc shape, about 4-5 inches in diameter. Try to make the edges a little thinner than the center. This will help us seal the cherry filling inside. If the dough tears a bit, don’t worry, you can pinch it back together. Repeat this with all your biscuits. You should have a nice little assembly line of flattened biscuit dough ready for their cherry surprise.
Filling and Sealing the Bombs
Now for the star of the show – the cherry pie filling! Spoon about 1 to 1.5 tablespoons of the cherry pie filling into the center of each flattened biscuit. Be generous, but don’t overfill, or it will be difficult to seal properly and could ooze out during frying. Once the filling is in place, it’s time to seal these little bombs. Carefully bring the edges of the flattened biscuit up and over the filling, pinching them together firmly to create a senon-alcoholic aled ball. You want to ensure there are no gaps or holes where the filling can escape. You can even gently roll the senon-alcoholic aled ball between your palms to make it nice and smooth. If you have any excess dough from pinching, you can either tuck it in or very carefully remove it. The key is a tight seal. Once all your bombs are filled and senon-alcoholic aled, set them aside on a clean plate or parchment paper.
Frying to Golden Perfection
This is where the magic happens! In a large, heavy-bottomed pot or Dutch oven, pour enough vegetable oil to reach a depth of about 2-3 inches. Heat the oil over medium-high heat until it reaches approximately 350°F (175°C). It’s important to maintain this temperature; if the oil is too hot, the biscuits will brown too quickly on the outside and remain raw inside. If it’s too cool, they’ll absorb too much oil and become greasy. You can test the temperature by dropping a tiny piece of biscuit dough into the oil; it should sizzle immediately and float to the surface. Carefully, and in batches, gently place the prepared cherry pie bombs into the hot oil. Don’t overcrowd the pot, as this will lower the oil temperature. Fry the bombs for about 3-4 minutes per side, using a slotted spoon or spider strainer to gently turn them until they are a beautiful, deep golden brown on all sides. They should puff up slightly as they cook.
Draining and Glazing
Once your cherry pie bombs are perfectly golden and cooked through, carefully remove them from the hot oil using your slotted spoon or spider strainer. Place them on a wire rack set over a baking sheet or on paper towels to drain any excess oil. This step is crucial for achieving that delightful crispy texture without greasiness. While the bombs are still warm, it’s time to prepare the luscious glaze. In a medium bowl, whisk together the powdered sugar, milk, and light corn syrup until smooth and well combined. The corn syrup adds a lovely sheen and helps the glaze set slightly. You want a glaze that’s thick enough to coat the bombs but still pourable.
The Finishing Touch: Glazing and Enjoying
With your drained, warm Cherry Pie Bombs ready and your glaze perfectly mixed, it’s time for the grand finnon-alcoholic ale! You can do this in a couple of ways. You can either drizzle the glaze generously over the warm bombs, letting it cascade down the sides, or you can dip the tops of the bombs into the glaze, allowing the excess to drip off. For a more uniform look, use a spoon to spread the glaze. Work relatively quickly, as the glaze will start to set as the bombs cool. Once glazed, let them sit for a few minutes for the glaze to firm up slightly. And there you have it – your very own homemade Cherry Pie Bombs, ready to be devoured! They are best enjoyed warm, but they’re also delicious at room temperature. Enjoy the explosion of flavor!
Conclusion:
There you have it – your guide to creating delightful Cherry Pie Bombs! These little bursts of sweet and tart cherry goodness encased in flaky pastry are an absolute showstopper. They’re perfect for any occasion, from casual get-togethers to more formal dessert spreads. The beauty of this recipe lies in its simplicity and the incredibly satisfying result. You get all the classic flavors of cherry pie in a fun, bite-sized package that’s incredibly easy to eat and share.
I highly recommend serving your Cherry Pie Bombs warm, perhaps with a dollop of whipped cream or a scoop of vanilla ice cream for an extra decadent experience. They also make a fantastic addition to a brunch spread or a delightful treat to pack for a picnic. Don’t be afraid to get creative with variations! You could try adding a pinch of almond extract to the filling for a nutty twist, or perhaps a sprinkle of cinnamon and nutmeg. For a grown-up version, a splash of kirsch extract in the cherry filling would be divine.
I truly encourage you to give these Cherry Pie Bombs a try. They are surprisingly simple to make, and the joy they bring with every bite is unparalleled. I can’t wait for you to experience this incredible dessert!
Frequently Asked Questions:
Can I use fresh cherries instead of frozen?
Absolutely! If using fresh cherries, you’ll want to pit them and then proceed with the recipe as written. You might need to adjust the cooking time slightly as fresh cherries may release less liquid than frozen. Ensure they are well-drained before adding them to your pastry.
How should I store leftover Cherry Pie Bombs?
Store any leftover Cherry Pie Bombs in an airtight container at room temperature for up to two days, or in the refrigerator for up to four days. Reheat them gently in a warm oven or toaster oven before serving to restore their crispiness.
Can I make the dough for the Cherry Pie Bombs ahead of time?
Yes, you can definitely make the pastry dough in advance! Once prepared, wrap it tightly in plastic wrap and refrigerate it for up to two days. Allow it to soften slightly at room temperature for about 15-20 minutes before rolling it out.
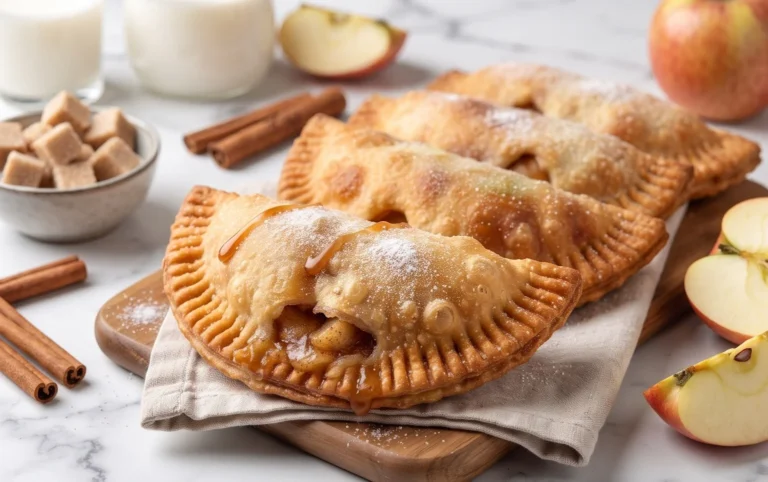
Cherry Pie Bombs
Deliciously fried biscuit bites filled with sweet cherry pie filling, drizzled with a simple powdered sugar glaze.
Ingredients
-
Vegetable oil, for frying
-
16.3 ounces Grands “Big” biscuits, flaky
-
21 ounces cherry pie filling
-
2 cups powdered sugar
-
1/4 cup milk
-
1 tablespoon light corn syrup
Instructions
-
Step 1
Open the biscuit packaging and separate the biscuits. Gently flatten each biscuit slightly with your hands or a rolling pin. -
Step 2
Spoon about 1-2 tablespoons of cherry pie filling into the center of each flattened biscuit. Be careful not to overfill. -
Step 3
Fold the edges of the biscuit around the filling, pinching to seal completely, forming a ball or ‘bomb’ shape. Ensure there are no gaps where the filling can leak out during frying. -
Step 4
Heat about 2-3 inches of vegetable oil in a heavy-bottomed pot or Dutch oven over medium-high heat to about 350°F (175°C). Use a thermometer for accuracy. -
Step 5
Carefully place a few cherry pie bombs into the hot oil, being sure not to overcrowd the pot. Fry for 2-3 minutes per side, or until golden brown and puffed. -
Step 6
Remove the fried bombs from the oil with a slotted spoon and place them on a paper towel-lined plate to drain excess oil. -
Step 7
While the bombs are cooling slightly, whisk together the powdered sugar, milk, and light corn syrup in a small bowl until smooth and drizzleable. Add more milk if needed for desired consistency. -
Step 8
Drizzle the glaze generously over the warm cherry pie bombs. Serve immediately.
Important Information
Nutrition Facts (Per Serving)
It is important to consider this information as approximate and not to use it as definitive health advice.
Allergy Information
Please check ingredients for potential allergens and consult a health professional if in doubt.