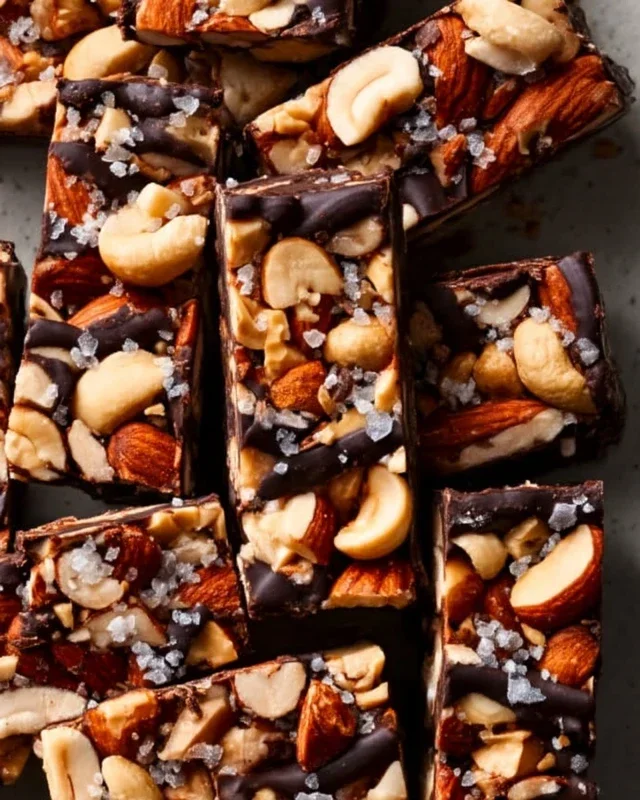
Dark Chocolate Sea Salt Nut Bars-Decadent Treat
Dark Chocolate and Sea Salt Nut Bars are more than just a treat; they’re a perfectly balanced symphony of rich, decadent chocolate and the satisfying crunch of toasted nuts, all kissed with a sprinkle of flaky sea salt. If you’re anything like me, the allure of that sweet and salty combination is simply irresistible. These bars tap into that primal craving, delivering an intensely satisfying experience with every bite. What makes these Dark Chocolate and Sea Salt Nut Bars truly special is their incredible versatility. They’re the ultimate grab-and-go snack for busy afternoons, a sophisticated dessert that requires minimal fuss, or even a thoughtful homemade gift that’s sure to impress. The deep, complex flavor of dark chocolate melting into the nutty texture, punctuated by those bright bursts of sea salt, creates a moment of pure bliss that’s hard to replicate. Get ready to fall in love with your new go-to confection!
Ingredients:
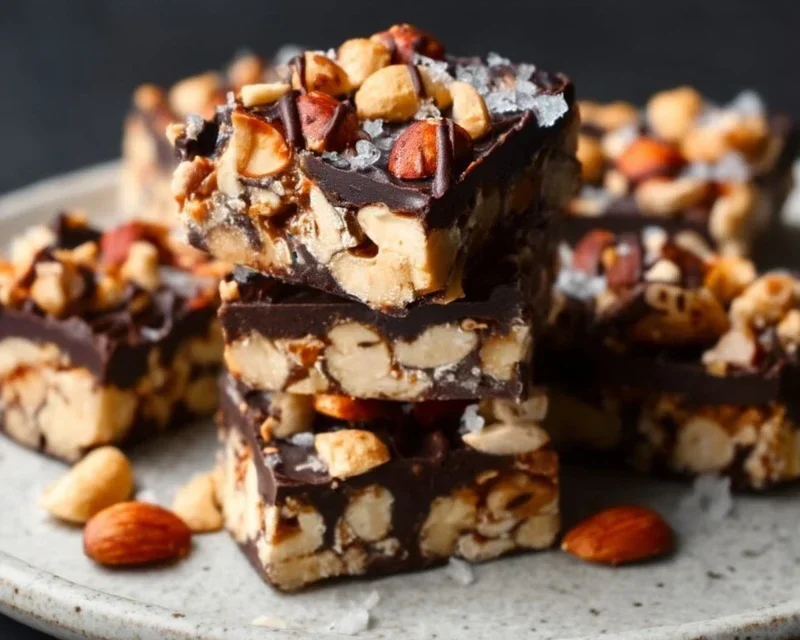
Let’s talk about pure, unadulterated deliciousness. These Dark Chocolate and Sea Salt Nut Bars are the perfect answer to those mid-afternoon cravings, a delightful post-workout treat, or even a surprisingly sophisticated dessert. They’re wonderfully chewy, packed with satisfying crunch, and that perfect balance of sweet, salty, and deeply chocolatey. The best part? They’re incredibly easy to make, requiring no fancy equipment or complicated techniques. You’ll be amazed at how quickly you can whip up a batch of these wholesome, flavor-packed bars.
The beauty of these bars lies in their simplicity and the quality of their ingredients. We’ve opted for a blend of unsalted nuts to provide a robust, nutty base. Cashews lend a creamy richness, peanuts offer that classic, comforting flavor, and almonds contribute a satisfying crunch and subtle sweetness. Feel free to experiment with your favorites – walnuts, pecans, or even a mix of macadamia nuts would be fantastic. The puffed rice adds a delightful lightness and texture, preventing the bars from becoming too dense. Brown rice syrup is our binder of choice, providing a natural sweetness and chegrape juicess that’s superior to granulated sugar in this application. A good quality vanilla extract enhances all the other flavors, and a touch of sea salt is absolutely crucial for elevating the sweetness and bringin extractg out the best in the chocolate. Speaking of chocolate, we’re using dark chocolate chips for that intense, slightly bitter cocoa flavor that pairs so wonderfully with the salt. A little coconut oil helps the chocolate melt smoothly for a beautiful drizzle.
Preparing Your Nut Mixture
The first step in creating these incredible bars is to get our nut and puffed rice mixture ready. This is where the bulk of the texture and flavor comes from, so let’s make it count. Start by taking your chosen unsalted nuts – our blend of cashews, peanuts, and almonds works beautifully, offering a spectrum extract of flavors and textures. If you’re using whole nuts, I highly recommend giving them a rough chop. You don’t want them to be powder, but rather in pieces that are easy to bite into. This also helps them distribute evenly throughout the bars. Think of bite-sized pieces, maybe a quarter to a half-inch in size for most of them, with some smaller bits for filling in the gaps. You can do this with a sharp knife on a cutting board or pulse them gently in a food processor. Be careful not to over-process them into a paste! Once your nuts are chopped to your liking, combine them in a large mixing bowl with the puffed rice. The puffed rice should remain relatively whole, adding that lovely crispiness. Give them a gentle stir to ensure they’re well mixed. This dry mixture forms the foundation of our bars.
Creating the Binder and Incorporating Flavors
Now it’s time to bring everything together with our sweet, sticky binder. In a small saucepan, gently heat the brown rice syrup over low heat. You don’t want to boil it, just warm it enough so it becomes more fluid and easier to mix. As it warms, stir in the vanilla extract and the 1/2 teaspoon of sea salt. The vanilla will infuse its lovely aroma and flavor into the syrup, and the salt will begin extract to dissolve. Whisk it until everything is beautifully combined. This warm, flavored syrup is what will bind all our dry ingredients together.
Once the syrup is warm and fragrant, carefully pour it over the nut and puffed rice mixture in your large bowl. This is where the magic starts to happen. Using a sturdy spatula or a wooden spoon, begin extract to mix everything together thoroughly. You want to ensure that every single piece of nut and puffed rice is coated in the sticky syrup. It might seem a little daunting at first, and you’ll need to put a bit of effort into it, but keep stirring and folding until you have a uniform mixture. Scrape down the sides of the bowl and the bottom to make sure no dry bits are left behind. This step is crucial for ensuring your bars hold together well.
Forming and Pressing the Bars
With your delicious mixture ready, it’s time to get it into a pan and shaped into bars. Line an 8×8 inch baking pan with parchment paper, leaving some overhang on the sides. This overhang will be your handles for lifting the bars out later, making the process much cleaner and easier. Pour the nut and syrup mixture into the prepared pan. Now comes the really important part: pressing it down firmly and evenly. Use your spatula, or even the bottom of a flat glass, to press the mixture down as tightly as possible into the pan. You want to create a compact, solid layer. The firmer you press, the better your bars will hold their shape and the less crum extractbly they will be. Really put your weight into it! Ensure the surface is as flat and even as you can get it. This is where those great textures will come from in every bite.
Chilling and Chocolate Drizzle
Once your mixture is pressed firmly into the pan, it’s time for a good chill. Place the pan in the refrigerator for at least 1 hour, or until the mixture is firm to the touch. This chilling process allows the brown rice syrup to set and solidify, making it much easier to cut into bars. While the base is chilling, let’s prepare our decadent chocolate topping. In a small, microwave-safe bowl, combine the dark chocolate chips and the 2 teaspoons of coconut oil. Microwave in 30-second intervals, stirring well after each interval, until the chocolate is completely melted and smooth. Be patient here; you don’t want to scorch the chocolate. The coconut oil helps to make the melted chocolate a little thinner, perfect for drizzling.
Once your nut base is firm, carefully lift it out of the pan using the parchment paper handles. Place it on a cutting board. Now, drizzle the melted dark chocolate evenly over the top of the chilled nut mixture. You can use a spoon to create wavy patterns or a fork for a more uniform coating. If you’re feeling fancy, sprinkle a little flaky sea salt over the melted chocolate while it’s still wet. This adds an extra layer of visual appeal and a delightful pop of salty crunch.
Cutting and Enjoying
After the chocolate has been drizzled, return the entire slab to the refrigerator for another 30 minutes to an hour, or until the chocolate is completely set. Once the chocolate is firm, you can finally cut your bars! Lift the slab out of the pan using the parchment paper and place it on a cutting board. Use a sharp knife to cut the slab into your desired bar sizes. If the chocolate is very hard, you might want to warm the knife slightly under hot water and dry it before cutting. Store any leftover bars in an airtight container in the refrigerator. These bars are best enjoyed cold, offering that satisfyingly firm bite and a burst of flavor with every mouthful. Enjoy your homemade deliciousness!
Conclusion:
These Dark Chocolate and Sea Salt Nut Bars are an absolute winner for anyone seeking a satisfying, homemade treat that’s both decadent and relatively wholesome. The perfect balance of rich, dark chocolate, the satisfying crunch of assorted nuts, and that delightful hint of sea salt creates a flavor profile that’s simply irresistible. They’re incredibly versatile, making them ideal for a quick breakfast on the go, an afternoon energy boost, or even a sophisticated dessert option. Don’t hesitate to experiment with different nut combinations – almonds, walnuts, pecans, or even pistachios would be fantastic additions or substitutions. You could also stir in some dried cranberries or shredded coconut for extra texture and flavor complexity. I truly encourage you to give these Dark Chocolate and Sea Salt Nut Bars a try; I’m confident you’ll find them to be a new favorite in your recipe repertoire.
Frequently Asked Questions:
Can I make these bars vegan?
Absolutely! To make these Dark Chocolate and Sea Salt Nut Bars vegan, simply ensure you use a vegan dark chocolate that contains no dairy. Most dark chocolates are naturally dairy-free, but it’s always good to check the ingredients list. The rest of the ingredients are typically vegan-friendly.
How should I store these nut bars?
For best results and to maintain their texture, store your Dark Chocolate and Sea Salt Nut Bars in an airtight container at room temperature for up to a week. If your kitchen is particularly warm, or you live in a humid climate, you might prefer to store them in the refrigerator to prevent the chocolate from melting. They’ll keep well in the fridge for up to two weeks.
What if I don’t have sea salt? Can I use regular salt?
While sea salt offers a wonderful, coarse texture and a cleaner salt flavor that complements the chocolate beautifully, you can use regular table salt in a pinch. However, be very cautious with the amount. Table salt is much finer and more potent. Start with a very small pinch and taste your mixture before adding more, as it’s easy to oversalt with table salt. The visual appeal of sea salt is also a nice touch.
Dark Chocolate and Sea Salt Nut Bars
Chewy and satisfying bars packed with nuts, puffed rice, and drizzled with dark chocolate and sea salt.
Ingredients
-
2 1/2 cups unsalted nuts of choice (3/4 cup cashews, 3/4 cup peanuts, 1 cup almonds)
-
1/2 cup puffed rice
-
1/4 cup brown rice syrup
-
1 1/2 teaspoon vanilla extract
-
1/2 teaspoon sea salt
-
1 cup dark chocolate chips
-
2 teaspoons coconut oil
-
Flaky salt for topping (optional)
Instructions
-
Step 1
Line an 8×8 inch baking pan with parchment paper, leaving an overhang on the sides. Lightly grease the parchment paper. -
Step 2
In a large bowl, combine the nuts and puffed rice. Set aside. -
Step 3
In a small saucepan, gently heat the brown rice syrup, vanilla extract, and 1/2 teaspoon sea salt over medium-low heat until warm and well combined. Do not boil. -
Step 4
Pour the warm syrup mixture over the nut and puffed rice mixture. Stir well until everything is evenly coated. -
Step 5
Press the mixture firmly into the prepared baking pan. Use another piece of parchment paper or a spatula to help compact it evenly. -
Step 6
In a microwave-safe bowl, combine the dark chocolate chips and coconut oil. Microwave in 30-second intervals, stirring between each, until melted and smooth. -
Step 7
Drizzle the melted dark chocolate over the pressed nut mixture. If using, sprinkle flaky salt over the chocolate. -
Step 8
Refrigerate for at least 1 hour, or until the chocolate is set. Lift the bars out of the pan using the parchment paper overhang. Cut into desired bar shapes.
Important Information
Nutrition Facts (Per Serving)
It is important to consider this information as approximate and not to use it as definitive health advice.
Allergy Information
Please check ingredients for potential allergens and consult a health professional if in doubt.