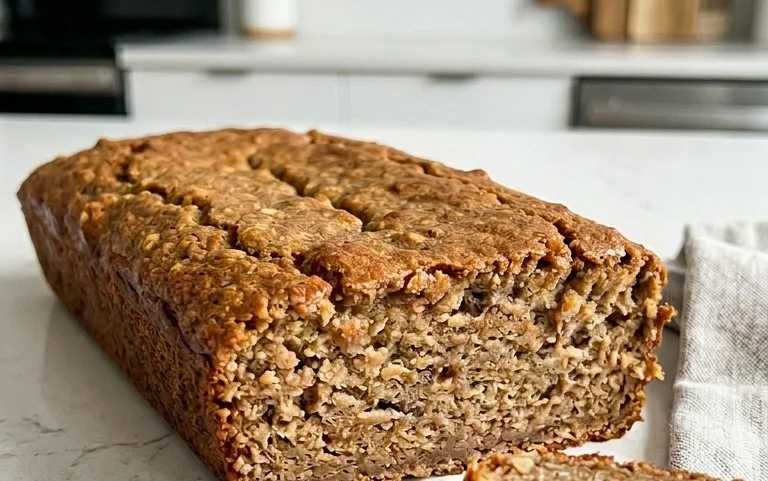
Moist Banana Bread Recipe – Easy & Delicious
The Best Moist Banana Bread Recipe you’ll ever encounter is here, and trust me, it’s a game-changer. Forget those dry, crum extractbly loaves that disappoint; this is the banana bread dreams are made of. There’s a reason why banana bread holds such a special place in our hearts and kitchens. It’s pure comfort in every slice, a perfect companion to a morning coffee or an afternoon treat. What makes this particular recipe stand out? It’s the meticulous balance of flavors and textures that results in an incredibly tender, wonderfully moist crum extractb, bursting with that irresistible sweet banana goodness. I’ve spent time perfecting this, and the secret lies in a few simple tricks that elevate it from good to absolutely unforgettable. Get ready to bake a loaf so perfect, it might just become your new go-to.
Moist Banana Bread Recipe
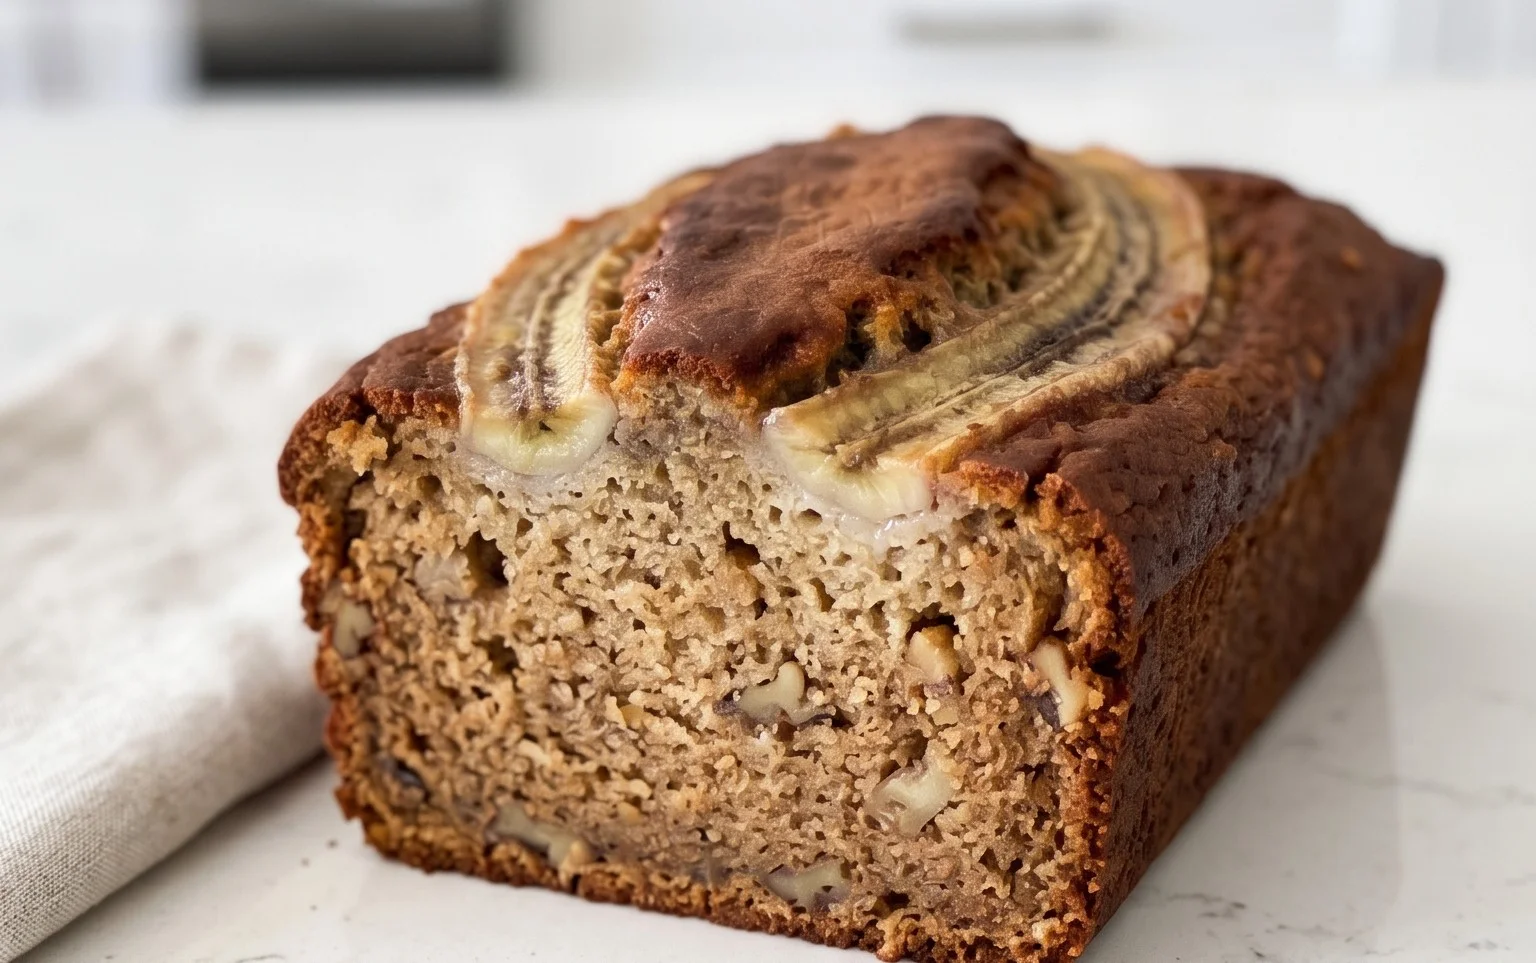
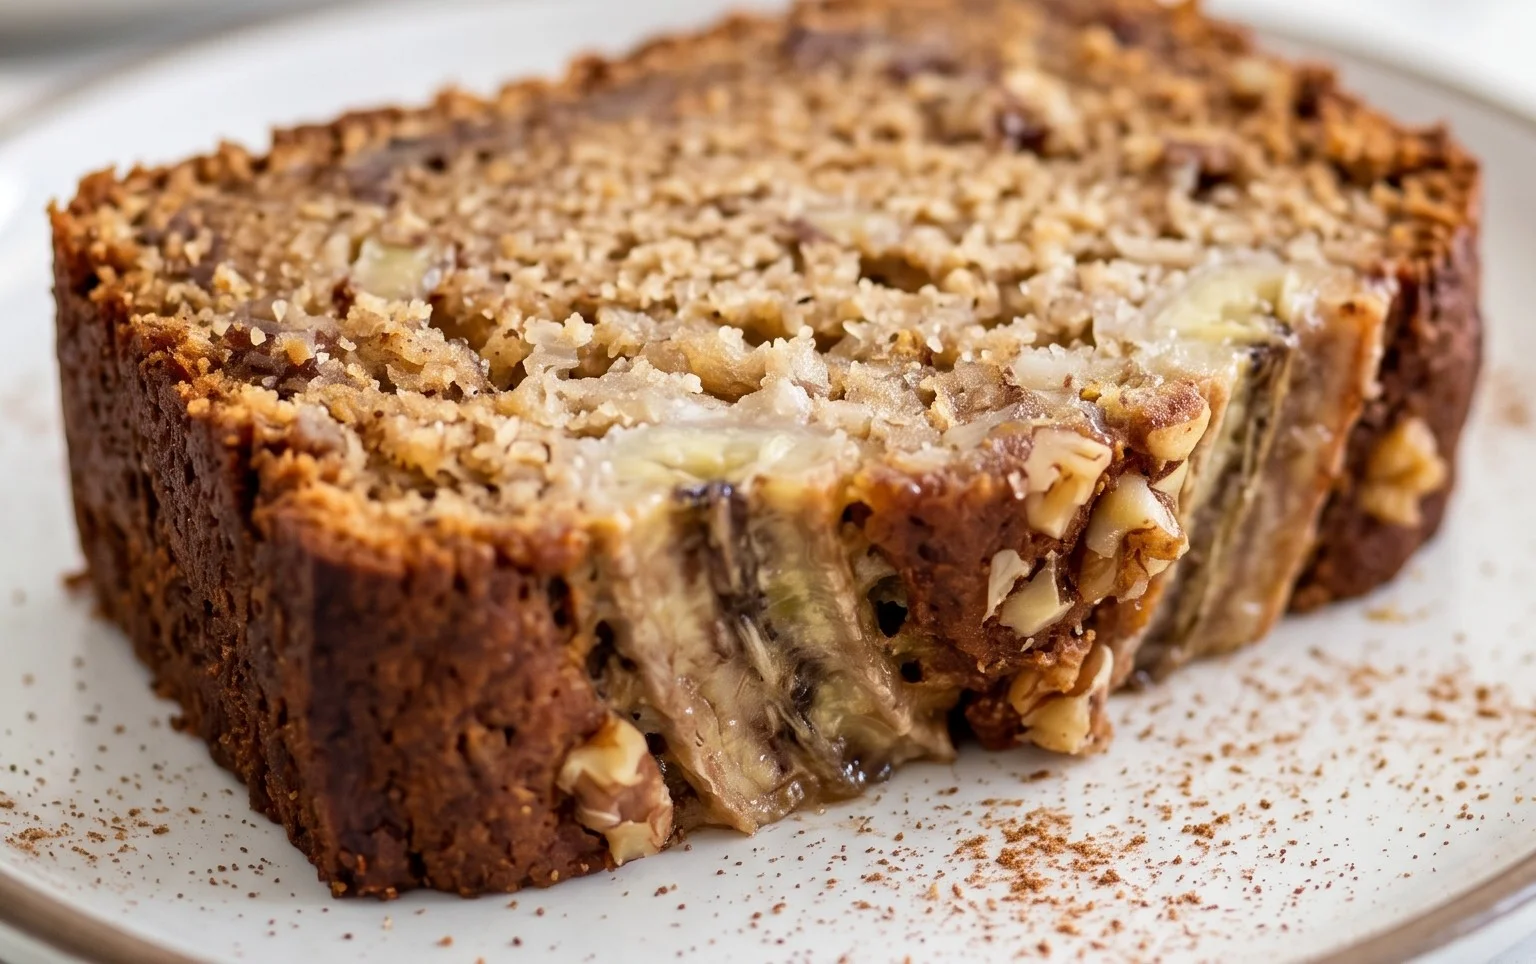
There’s something undeniably comforting about a slice of warm, moist banana bread. It’s a classic for a reason, perfect for breakfast, a snack, or even dessert. Forget those dry, crum extractbly loaves you might have encountered; this recipe is designed to deliver unparalleled moisture and flavor, thanks to a few key ingredients and techniques. I’ve spent years perfecting this recipe, tweaking it until I achieved what I believe is the absolute best moist banana bread. The secret lies in the balance of sugars, the richness of the sour cream, and the perfectly ripe bananas. Get ready to impress yourself and everyone lucky enough to share a slice!
Ingredients:
Cooking Instructions:
Let’s get baking! The process is straightforward, and the results are incredibly rewarding.
Preparation is Key
Before you even think about mixing, preheat your oven to 350°F (175°C). This ensures your oven is at the perfect temperature when your batter is ready. Grease and flour a 9×5 inch loaf pan. You can also line it with parchment paper for extra easy removal, leaving a slight overhang on the sides to help lift the bread out once it’s baked. This step is crucial for preventing sticking and ensuring a beautiful presentation.
Next, let’s talk about our star ingredient: the bananas. For the best flavor and moisture, use very ripe bananas. They should have plenty of brown spots, even appearing almost entirely brown. These are sweeter and easier to mash. Measure out 1 cup of mashed banana. This is approximately 2 and a half medium-sized bananas. Don’t worry about them being perfectly smooth; a few small lumps are perfectly fine and will add character to your bread.
Now, let’s prepare the oats. For this recipe, we want our oats to be finely ground into a powder. This isn’t just for texture; it helps to absorb excess moisture and contributes to the overall tender crum extractb of the bread. You can easily do this by placing the old-fashioned oats in a blender or food processor and pulsing until they resemble a coarse flour. Measure out 1/2 cup of this powdered oat flour.
Creaming the Fats and Sugars
In a large mixing bowl, cream together the softened butter, brown sugar, and granulated sugar. Use an electric mixer (handheld or stand mixer) on medium speed. Creaming is the process of beating these ingredients together until the mixture is light and fluffy, which incorporates air into the batter. This air will help our banana bread rise and achieve a tender texture. This typically takes about 2-3 minutes. Scrape down the sides of the bowl as needed to ensure everything is well combined.
Adding the Wet Ingredients
Once the butter and sugar are beautifully creamed, add the large eggs one at a time, beating well after each addition. Next, stir in the vanilla extract. This is where our banana flavor really starts to shine. Add the mashed ripe banana to the mixture. Beat on low speed until just combined. Don’t overmix at this stage; we want to keep the batter as light as possible.
Combining Dry Ingredients and Adding Sour Cream
In a separate medium bowl, whisk together the all-purpose flour, the powdered oats, baking soda, baking powder, and kosher salt. If you are using the optional cinnamon, nutmeg, and cloves, whisk them in with the dry ingredients now. Whisking these ingredients together ensures they are evenly distributed throughout the flour, preventing pockets of leavening agents or salt in your finished bread.
Now, we’ll gradually add the dry ingredients to the wet ingredients. Add about half of the dry ingredients to the butter-sugar-egg-banana mixture and mix on low speed until just combined. Then, add the sour cream and mix until it’s incorporated. Finally, add the remaining dry ingredients and mix on low speed until just combined. It is crucial to avoid overmixing at this stage. Overmixing develops the gluten in the flour, which can lead to a tough, dense banana bread. A few streaks of flour remaining are perfectly acceptable, as they will disappear during baking.
Baking to Perfection
Pour the batter into your prepared loaf pan, spreading it evenly. You can even gently tap the pan on the counter a few times to release any large air bubbles. Place the loaf pan in the preheated oven. Bake for 50-65 minutes. The exact baking time can vary depending on your oven, so it’s important to check for doneness.
You’ll know your banana bread is ready when a wooden skewer or toothpick inserted into the center comes out clean, or with a few moist crum extractbs attached. If the top is browning too quickly before the inside is cooked, you can loosely tent the pan with aluminum foil for the remainder of the baking time.
Cooling and Enjoying
Once baked, remove the loaf pan from the oven and let it cool in the pan on a wire rack for about 10-15 minutes. This initial cooling period allows the bread to set slightly. After this, carefully invert the loaf pan to remove the banana bread onto the wire rack to cool completely. Allowing it to cool completely is essential for the best texture and to prevent it from falling apart when you slice it. Once cooled, slice and enjoy your incredibly moist and delicious banana bread! It’s wonderful on its own, or with a smear of butter.
*Notes: The weight of mashed banana can vary based on ripeness and size. Aim for 1 cup.
**Powdering the oats helps create a finer texture and better moisture absorption.
Conclusion:
There you have it – the recipe for what I truly believe is the best moist banana bread! This recipe isn’t just about using ripe bananas; it’s about the perfect balance of ingredients and simple techniques that guarantee a tender, flavorful loaf every single time. The key to its incredible moisture lies in the generous amount of mashed banana, a touch of sour cream or yogurt, and the careful baking process. This banana bread is wonderfully versatile. Enjoy it warm for breakfast with a smear of butter, as a delightful afternoon snack, or even as a simple dessert. For serving, I love it plain, but a drizzle of chocolate ganache or a sprinkle of chopped walnuts can elevate it further.
Don’t be afraid to experiment! You can easily add chocolate chips, blueberries, or even a pinch of cinnamon and nutmeg for extra warmth. The possibilities are truly endless with this fantastic foundation. I encourage you to give this best moist banana bread recipe a try. I’m confident it will become a staple in your baking repertoire. I can’t wait to hear about your delicious creations!
Frequently Asked Questions:
Q1: How do I ensure my bananas are ripe enough for the best flavor and moisture?
A: For the ultimate flavor and moisture, your bananas should be very ripe. Look for ones that are heavily speckled with brown or even mostly brown. These bananas are sweeter and easier to mash, contributing significantly to the moist texture and rich banana flavor of your bread.
Q2: Can I substitute the sour cream or yogurt in this recipe?
A: Yes, you can! If you don’t have sour cream or yogurt on hand, you can often substitute it with an equal amount of buttermilk or even full-fat plain Greek yogurt. Some bakers have also had success with a neutral oil like canola oil, though it might slightly alter the texture.
Q3: How should I store leftover banana bread?
A: Once cooled completely, store your banana bread tightly wrapped in plastic wrap or in an airtight container at room temperature for up to 3 days. For longer storage, you can refrigerate it for about a week or freeze individual slices or the whole loaf for up to 3 months. Thaw at room temperature or gently reheat.
Best Moist Banana Bread Recipe
A classic recipe for incredibly moist and flavorful banana bread, perfect for using up ripe bananas.
Ingredients
-
1/2 cup butter (1 stick, softened)
-
1/2 cup brown sugar (packed)
-
1/2 cup granulated sugar
-
2 large eggs
-
2 teaspoons vanilla extract
-
1 cup mashed ripe banana (9 ounces, about 2 and 1/2 medium bananas)
-
1 cup all-purpose flour (spooned and leveled)
-
1/2 cup old fashioned oats (blended into a powder)
-
1 teaspoon baking soda
-
1 & 1/2 teaspoons baking powder
-
3/4 teaspoon kosher salt
-
1/2 cup sour cream
-
1/4 teaspoon cinnamon (optional)
-
1/8 teaspoon nutmeg (optional)
-
1/8 teaspoon cloves (optional)
Instructions
-
Step 1
Preheat oven to 350°F (175°C). Grease and flour a 9×5 inch loaf pan. -
Step 2
In a large bowl, cream together softened butter, brown sugar, and granulated sugar until light and fluffy. -
Step 3
Beat in eggs one at a time, then stir in vanilla extract and mashed banana. -
Step 4
In a separate bowl, whisk together all-purpose flour, powdered oats, baking soda, baking powder, kosher salt, and optional spices (cinnamon, nutmeg, cloves). -
Step 5
Gradually add the dry ingredients to the wet ingredients, mixing until just combined. Do not overmix. -
Step 6
Fold in the sour cream until evenly distributed. -
Step 7
Pour the batter into the prepared loaf pan and spread evenly. -
Step 8
Bake for 50-60 minutes, or until a wooden skewer inserted into the center comes out clean. -
Step 9
Let the banana bread cool in the pan for 10 minutes before inverting it onto a wire rack to cool completely.
Important Information
Nutrition Facts (Per Serving)
It is important to consider this information as approximate and not to use it as definitive health advice.
Allergy Information
Please check ingredients for potential allergens and consult a health professional if in doubt.