Easy Scones Recipe-Perfect Fluffy Baked Goods
Scones Recipe: The ultimate comfort baked good, and for good reason! There’s something undeniably magical about a perfectly baked scone. It’s that delightful crum extractb, that ever-so-slight crisp on the outside yielding to a tender, fluffy interior. People adore this simple yet satisfying treat because it’s so versatile. Enjoyed warm with a dollop of clotted cream and jam, or perhaps brushed with a sweet glaze, a good scone recipe is a treasure. What truly makes scones special is their ability to evoke a sense of home, tradition, and simple indulgence. Whether you’re a seasoned baker or just starting out, mastering this Scones Recipe will undoubtedly bring a smile to your face and delight to your taste buds. Get ready to fill your kitchen with the most wonderful aroma!

Simple & Delicious Scones Recipe
There’s something incredibly comforting about a warm, freshly baked scone, isn’t there? Whether it’s slathered with clotted cream and jam or enjoyed plain with a cup of tea, a good scone is a simple pleasure that never fails to impress. Forget those dense, dry disappointments you might have encountered elsewhere; this recipe is designed to yield light, fluffy, and wonderfully tender scones every single time. We’re going to walk through it step-by-step, so even if you’re new to baking, you’ll be enjoying these delightful treats in no time.
This recipe is incredibly versatile, allowing you to tailor it to your favorite flavors. I’ve included suggestions for mix-ins, but feel free to get creative! The key to perfect scones lies in a few simple techniques, and I’ll be sharing those with you throughout the instructions. So, gather your ingredients, preheat your oven, and let’s get baking!
Ingredients:
Preparing the Dough
The foundation of a great scone is a light and tender crum extractb, and that starts with how we handle the butter and flour. The butter needs to be cold because we want to create little pockets of fat within the flour mixture. When these pockets melt in the oven, they release steam, which helps to create those beautiful flaky layers we love.
Step 1: Combine Dry Ingredients
In a large mixing bowl, whisk together the all-purpose flour, granulated sugar, baking powder, and salt. Make sure everything is well combined. This ensures that the leavening agents and salt are evenly distributed, leading to a consistent rise and flavor in your scones. If you’re using dried fruit mix-ins like currants or dried cranberries, you can add them now and toss them with the dry ingredients to prevent them from clumping together later.
Step 2: Cut in the Butter
Add the chilled, cubed butter to the dry ingredients. Using a pastry blender, your fingertips, or two forks, cut the butter into the flour mixture until it resembles coarse crum extractbs with some pea-sized pieces of butter remaining. This is a crucial step. Don’t overwork the mixture; you want to see those distinct pieces of butter. If you use your hands, work quickly to avoid warming the butter too much. The goal is to coat the flour particles with fat, which inhibits gluten development and results in a tender scone.
Bringin extractg the Dough Together
Now we’re going to bring everything together to form our scone dough. This is where we introduce the wet ingredients. Again, the key here is gentle handling. Overmixing at this stage will develop the gluten in the flour too much, leading to tough scones.
Step 3: Add Wet Ingredients
In a separate small bowl or jug, whisk together the ½ cup plus 1 tablespoon of chilled heavy cream and the lightly beaten egg. Make a well in the center of the flour and butter mixture and pour in the cream and egg mixture. Using a fork or a spatula, gently mix the ingredients until they are just combined and a shaggy dough forms. Do not overmix! The dough should still look a little crum extractbly in places, but it should hold together when gently pressed. If you’re using fresh fruit like blueberries or blackberries, gently fold them in now, taking care not to crush the berries.
Shaping and Baking Your Scones
The final steps involve shaping our dough and getting them into the oven. This is where the magic happens!
Step 4: Shape the Dough
Turn the dough out onto a lightly floured surface. Gently knead the dough a few times, just enough to bring it together into a cohesive ball. Avoid prolonged kneading. Pat or gently roll the dough into a disc about ¾ to 1 inch thick. You can then cut this disc into wedges using a sharp knife or a pizza cutter, or you can use a round biscuit cutter to create individual scones. If you’re using a cutter, press straight down without twisting, as twisting can seal the edges and prevent the scones from rising evenly. Place the shaped scones onto a baking sheet lined with parchment paper, leaving a little space between them.
Step 5: Bake to Golden Perfection
Preheat your oven to 400°F (200°C). Once your scones are shaped and on the baking sheet, brush the tops lightly with a little extra heavy cream. This will give them a lovely golden sheen and a slightly crispier crust. You can also sprinkle them with a little extra sugar at this stage if you like a sweeter top. Bake for 15-20 minutes, or until the scones are golden brown and have risen nicely. A toothpick inserted into the center of a scone should come out clean.
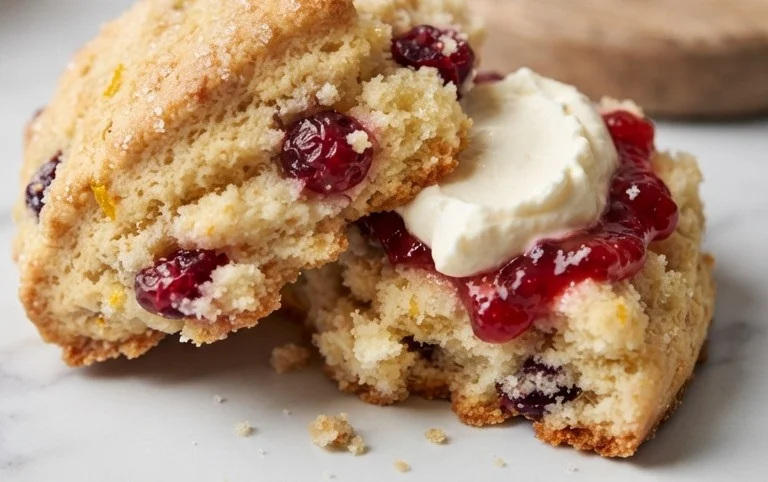
Allow the scones to cool on the baking sheet for a few minutes before transferring them to a wire rack to cool completely. They are absolutely delicious served warm with your favorite accompaniments like butter, jam, clotted cream, or even a drizzle of honey. Enjoy the fruits of your labor!
Conclusion:
I hope you’ve enjoyed learning how to make these delightful scones! This recipe truly shines because of its simplicity and the incredible versatility it offers. Within minutes, you can create a batch of perfectly tender and golden scones that are far superior to anything store-bought. They’re the ideal canvas for your favorite toppings, whether it’s a dollop of clotted cream and jam for a classic afternoon tea, a smear of butter, or even some sweet fruit preserves. Don’t hesitate to experiment with additions like fresh berries, chocolate chips, or even a hint of lemon zest for a citrusy twist. I truly encourage you to give this scones recipe a try – I’m confident you’ll be delighted with the results and find yourself making them again and again.
Frequently Asked Questions:
Can I make the scone dough ahead of time?
Yes, you can prepare the scone dough up to a day in advance. Shape the dough into rounds, place them on a parchment-lined baking sheet, cover them loosely with plastic wrap, and refrigerate. Bake them as usual, but they might need a minute or two longer in the oven.
What is the best way to store leftover scones?
Once completely cooled, store leftover scones in an airtight container at room temperature for up to 2 days. They are best enjoyed fresh, but you can also refresh them slightly by warming them in a low oven for a few minutes before serving.
Scones Recipe
A classic and versatile scone recipe, perfect for any occasion. Easily customizable with your favorite mix-ins.
Ingredients
-
6 tablespoons unsalted butter
-
2 cups all-purpose flour
-
⅓ cup granulated sugar
-
1 tablespoon baking powder
-
½ teaspoon salt
-
½ cup plus 1 tablespoon heavy cream
-
1 large egg
-
1 cup fresh blueberries
Instructions
-
Step 1
Preheat oven to 400°F (200°C). Line a baking sheet with parchment paper. -
Step 2
In a large bowl, whisk together the flour, sugar, baking powder, and salt. -
Step 3
Cut in the cold butter using a pastry blender or your fingertips until the mixture resembles coarse crumbs. -
Step 4
In a separate small bowl, whisk together the heavy cream and lightly beaten egg. Pour this wet mixture into the dry ingredients and stir until just combined. Gently fold in your desired mix-ins. -
Step 5
Turn the dough out onto a lightly floured surface and gently pat it into a 1-inch thick disc. Cut the disc into 8 wedges. -
Step 6
Place the scones on the prepared baking sheet. Brush the tops with a little extra heavy cream for a golden finish. -
Step 7
Bake for 15-20 minutes, or until golden brown and cooked through.
Important Information
Nutrition Facts (Per Serving)
It is important to consider this information as approximate and not to use it as definitive health advice.
Allergy Information
Please check ingredients for potential allergens and consult a health professional if in doubt.