Easy Chocolate Swiss Roll Recipe-Quick Delicious Dessert
Easy Chocolate Swiss Roll: the dessert that whispers promises of pure indulgence, yet delivers on its simple, comforting charm. Who can resist a dessert that looks so elegant, so sophisticated, yet is surprisingly achievable for even the most novice baker? It’s a crowd-pleaser, a showstopper that always impresses, and the perfect way to elevate any occasion. The beauty of an Easy Chocolate Swiss Roll lies in its delightful contrast: a light, airy sponge cake rolled with a rich, decadent chocolate filling. It’s this perfect harmony of textures and flavors that makes it so universally loved. Forget complicated techniques; this recipe is designed to bring the magic of a homemade Swiss roll into your kitchen with minimal fuss and maximum reward. Get ready to create a dessert that will have everyone asking for seconds!
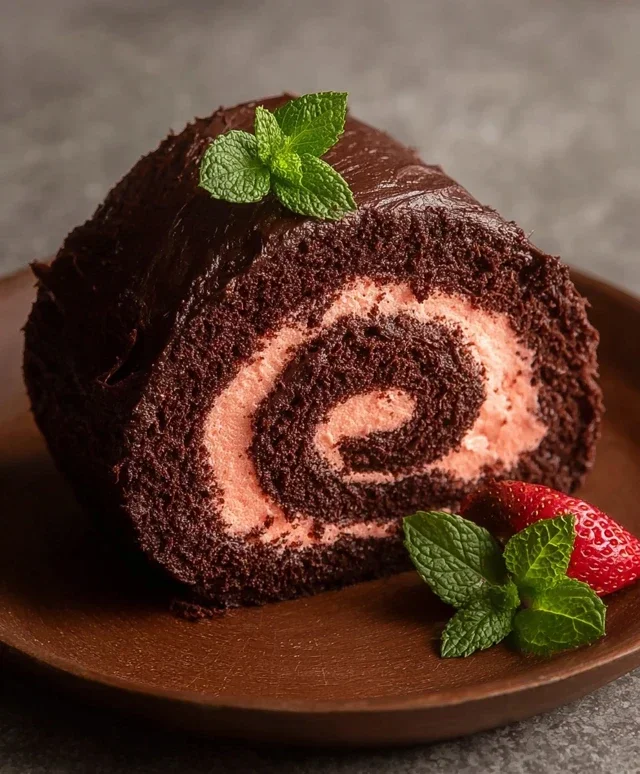
Easy Chocolate Swiss Roll
Welcome to a delightfully easy and surprisingly decadent chocolate Swiss roll recipe! This treat is perfect for a weekend bake, a special occasion, or simply when a chocolate craving strikes. What makes this recipe particularly special is that it’s entirely dairy-free and can easily be made gluten-free depending on your flour choices. We’ll be using a combination of oat and cassava flour for a tender yet sturdy cake, and a luscious dairy-free chocolate buttercream to fill and frost. Get ready to impress yourself and anyone lucky enough to share this with you!
Ingredients:
Instructions:
Prepare the Cake Batter: Start by preheating your oven to 175°C (350°F). Line a 33cm x 23cm (13 inch x 9 inch) baking pan with parchment paper, leaving an overhang on the sides to help with lifting the cake out later. In a medium bowl, whisk together the oat flour, cassava flour, cocoa powder, arrowroot starch, baking powder, and baking soda. Ensure these dry ingredients are well combined to distribute the leavening agents evenly. In a separate large bowl, whip the aquafaba using an electric mixer on high speed until soft peaks form. Gradually add 100g of the granulated sugar (or coconut sugar) to the aquafaba, continuing to whip until stiff, glossy peaks form, similar to meringue. This aquafaba meringue will provide the lift and airy texture to our cake.
Combine Wet and Dry Ingredients: To the aquafaba mixture, gently fold in the unsweetened applesauce and dairy-free yogurt. Be careful not to overmix, as this can deflate the aquafaba. In a small bowl, combine the remaining 100g of granulated sugar with the melted vegan butter. Add this sugar and butter mixture to the aquafaba base, along with the dry ingredients. Fold everything together until just combined, taking care to scrape the bottom and sides of the bowl to ensure no dry pockets remain. The batter should be smooth and pourable.
Bake the Cake: Pour the batter evenly into the prepared baking pan. Gently tap the pan on the counter a few times to release any large air bubbles. Bake for 12-15 minutes, or until a wooden skewer inserted into the center comes out clean. The cake should be springy to the touch. Do not overbake, as this will result in a dry cake that is more prone to cracking when rolled. While the cake is baking, lay out a clean, lint-free dish towel on your counter and generously dust it with the 2 tbsp of cocoa powder. This cocoa dusting will prevent the cake from sticking to the towel as it cools and rolls.
Roll the Cake: As soon as the cake comes out of the oven, carefully invert it onto the prepared cocoa-dusted dish towel. Peel off the parchment paper. While the cake is still warm, carefully begin extract to roll it up from one of the shorter ends, using the dish towel to guide and support it. Roll it snugly but not so tight that it cracks. Once rolled, allow the cake to cool completely within the dish towel. This cooling process within the towel helps the cake to set its shape and become more pliable for filling and frosting. Patience here is key!
Make the Chocolate Strawberry Buttercream: While the cake cools, prepare the filling. In a large bowl, beat the room-temperature vegan butter until light and fluffy. Gradually add the pulsed freeze-dried strawberry flour and the remaining 100g of granulated sugar (or coconut sugar), continuing to beat until well combined and smooth. If the buttercream seems too thick, you can add a tablespoon of dairy-free milk at a time until you reach your desired consistency. For a richer chocolate flavor, you can also add a tablespoon of cocoa powder to this buttercream. Ensure the buttercream is spreadable but not too soft.
Assemble and Decorate: Once the cake has cooled completely, carefully unroll it. Spread a generous layer of the chocolate strawberry buttercream evenly over the surface of the cake, leaving a small border around the edges. Re-roll the cake more tightly this time, using the dish towel to help you. Place the rolled cake seam-side down on a serving platter. You can then crum extractb coat the entire cake with a thin layer of the buttercream if desired, or frost it directly with the remaining buttercream. For an extra touch, you can drizzle some melted vegan chocolate over the top and garnish with the sliced fresh strawberries. Chill the Swiss roll for at least 30 minutes before slicing and serving to allow the buttercream to set.
Conclusion:
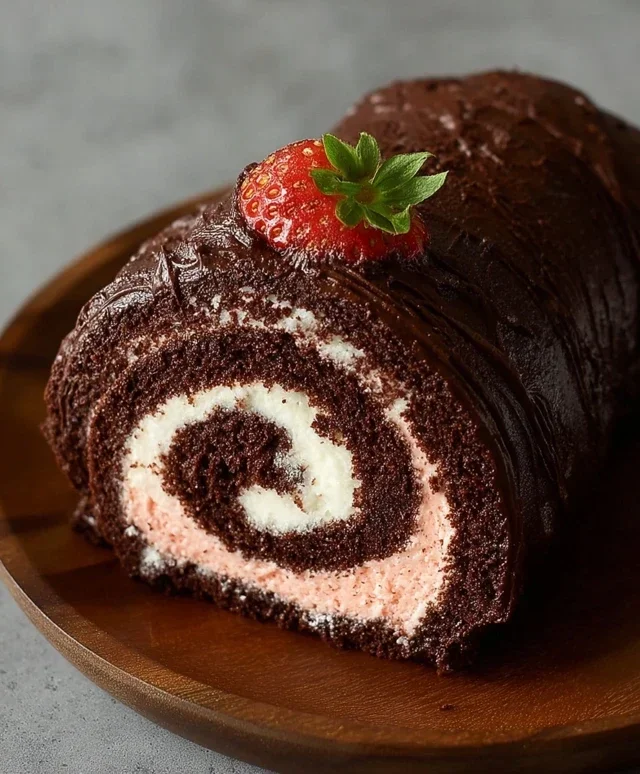
And there you have it! Your very own Easy Chocolate Swiss Roll, ready to impress without the fuss. This recipe truly proves that a showstopper dessert doesn’t need to be complicated. The light and airy chocolate sponge, combined with a luscious creamy filling, creates a delightful texture and rich flavor that’s simply irresistible. It’s the perfect treat for any occasion, from a casual afternoon tea to a special celebration. Don’t be intimidated by the “Swiss roll” name – this approachable method makes it achievable for bakers of all levels. I encourage you to give this easy chocolate Swiss roll a try; you’ll be so proud of the beautiful creation you can whip up!
For serving, I love slicing it into thick portions and enjoying it just as it is. It’s also fantastic with a dusting of powdered sugar, a dollop of fresh whipped cream, or even a drizzle of extra chocolate ganache. Feeling adventurous? Consider adding a splash of coffee liqueur extract to the sponge batter for a mocha twist, or incorporate some fresh berries into the filling. The possibilities are endless!
Frequently Asked Questions:
Why did my Swiss roll crack when I rolled it?
A common issue! Ensure your sponge is still warm when you start rolling. Rolling it in a clean tea towel sprinkled with powdered sugar helps prevent sticking and cracking. Don’t roll it too tightly at first; a gentle but firm roll is key.
Can I make the filling ahead of time?
Absolutely! The cream filling can be made a day in advance and stored in an airtight container in the refrigerator. Just give it a quick whisk before spreading it onto the cooled sponge.
How do I store leftovers?
Leftover Swiss roll can be stored in an airtight container at room temperature for up to 2 days, or in the refrigerator for up to 4 days. Keep in mind refrigeration might slightly firm up the sponge.
Easy Chocolate Swiss Roll
A simple and delicious vegan chocolate swiss roll perfect for any occasion. Made with oat and cassava flour for a lighter texture, and a rich chocolate filling.
Ingredients
-
135 g oat flour
-
30 g cassava flour
-
30 g cocoa powder
-
1 tbsp arrowroot starch
-
1 1/2 tsp baking powder
-
1/2 tsp baking soda
-
122 mL aquafaba, room temperature
-
200 g organic granulated sugar or coconut sugar, divided
-
100 g unsweetened applesauce, room temperature
-
60 g unsweetened dairy free yogurt, room temperature
-
2 tbsp cocoa powder for dusting the dish towel
-
1 cup sliced strawberries, for garnish
-
226 g vegan butter, room temperature
-
70 g freeze dried strawberries, pulsed into a flour
-
Coconut fat from 1 can full-fat coconut cream
Instructions
-
Step 1
Preheat oven to 350°F (175°C). Line a 10×15 inch jelly roll pan with parchment paper and grease. Dust a clean kitchen towel with 2 tbsp cocoa powder. -
Step 2
In a large bowl, whisk together oat flour, cassava flour, 30g cocoa powder, arrowroot starch, baking powder, and baking soda. -
Step 3
In a separate bowl, beat aquafaba until foamy. Gradually add 100g of the sugar and continue beating until stiff peaks form. -
Step 4
In another bowl, whisk together applesauce, dairy-free yogurt, and the remaining 100g sugar. Gently fold the wet ingredients into the dry ingredients until just combined. Then, gently fold in the aquafaba mixture. -
Step 5
Pour batter into the prepared pan and spread evenly. Bake for 12-15 minutes, or until a toothpick inserted into the center comes out clean. -
Step 6
Immediately invert the cake onto the cocoa-dusted towel. Peel off parchment paper. Starting from a short end, carefully roll up the cake with the towel inside. Let cool completely. -
Step 7
While the cake cools, prepare the filling. Beat vegan butter until creamy. Add coconut fat and pulsed freeze-dried strawberries. Beat until smooth and well combined. -
Step 8
Gently unroll the cooled cake. Spread the filling evenly over the cake, leaving a small border. Re-roll the cake tightly, this time without the towel. Chill for at least 30 minutes before slicing and serving with fresh strawberries.
Important Information
Nutrition Facts (Per Serving)
It is important to consider this information as approximate and not to use it as definitive health advice.
Allergy Information
Please check ingredients for potential allergens and consult a health professional if in doubt.