Easy Apple Pie Bars Recipe- Delicious Dessert
Apple pie bars are the ultimate dessert upgrade, offering all the cozy comfort of a classic apple pie with a delightfully convenient twist. Forget wrestling with pie crust or worrying about perfect crimping – these apple pie bars deliver that same warm, spiced apple filling nestled in a buttery, crum extractbly base and topped with a delightful streusel. It’s the perfect handheld treat for any occasion, from backyard BBQs to cozy movie nights. We all love apple pie for its nostalgic charm and comforting flavors, but these apple pie bars take it to a whole new level. They’re incredibly easy to slice and share, making them a guaranteed crowd-pleaser. The balance of sweet, tender apples, fragrant cinnamon, and that irresistible crum extractb topping is pure magic. Get ready to fall in love with these irresistible apple pie bars!
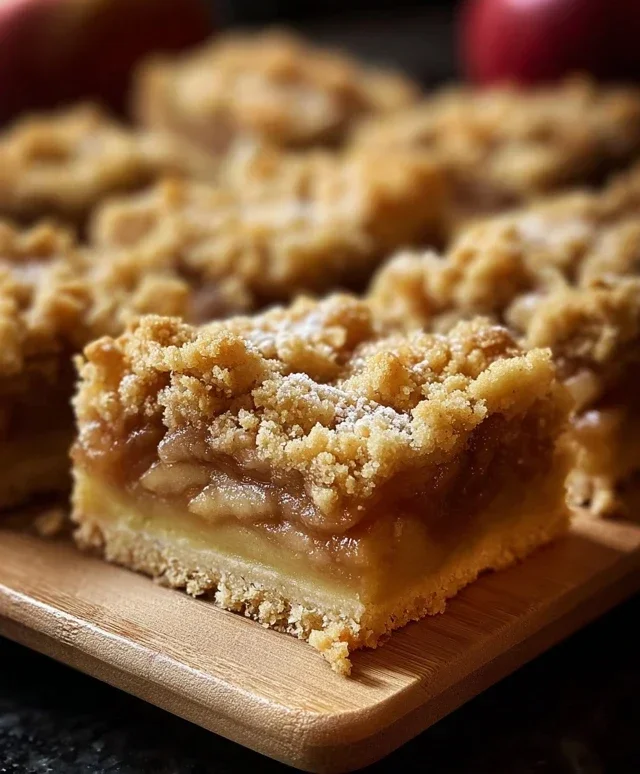
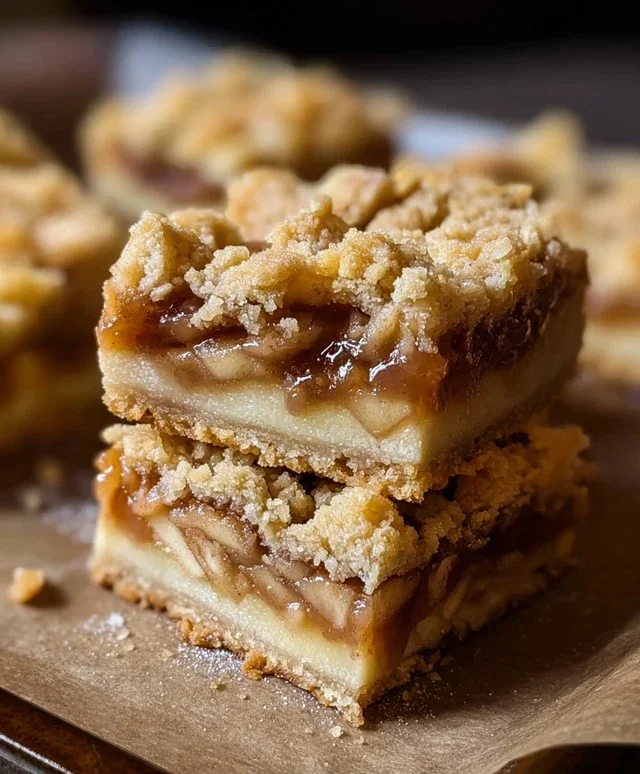
Apple Pie Bars
There’s something undeniably comforting about apple pie. The warm, spiced apples encased in a buttery crust – it’s a classic for a reason. But sometimes, a whole pie feels like a big commitment, or perhaps you’re looking for something a little more portable, a little more fun. That’s where these Apple Pie Bars come in. They capture all the beloved flavors of traditional apple pie but in a convenient, easy-to-eat bar form. Perfect for picnics, potlucks, or just a weeknight treat, these bars are sure to become a new favorite.
The beauty of these bars lies in their simplicity. We’re essentially creating a shortbread-like crust that doubles as the base and the topping, with a delicious apple filling nestled in between. The ingredients are straightforward, and the process is manageable for bakers of all levels. So, let’s get baking!
Ingredients:
Preparing the Crust and Filling
The first step to delicious apple pie bars is creating the perfect crust. This is a simple, press-in crust that’s delightfully buttery and crum extractbly. It also serves as the topping, so we’ll be dividing our dough.
1. Make the Crust Dough: In a large mixing bowl, whisk together the all-purpose flour, granulated sugar, baking powder, and salt. This dry mixture will form the foundation of our crust. Next, add the cold, cubed unsalted butter. Using a pastry blender, your fingertips, or a food processor, cut the butter into the dry ingredients until the mixture resembles coarse crum extractbs with some pea-sized pieces of butter still visible. Don’t overmix at this stage; those little pockets of butter will create flakiness. In a separate small bowl, whisk together the egg and vanilla extract. Pour this wet mixture into the flour and butter mixture. Gently mix until the dough just starts to come together. Be careful not to overwork the dough, as this can make the crust tough. The dough will be crum extractbly, which is exactly what we want for this type of crust.
2. Prepare the Apple Filling: While the dough is chilling slightly (a quick 15-20 minutes in the refrigerator is ideal, but not strictly mandatory if you’re in a hurry), let’s prepare our delicious apple filling. In a medium bowl, combine the peeled and diced apples with the lemon juice. The lemon juice is crucial here; it not only adds a touch of brightness to the flavor but also helps prevent the apples from browning. Next, add the brown sugar, cinnamon, and cornstarch. Stir everything together until the apples are evenly coated. The brown sugar will caramelize beautifully as it bakes, and the cinnamon provides that quintessential apple pie warmth. The cornstarch is essential for thickening the juices released by the apples, preventing a soggy bottom layer in your bars.
Assembling and Baking the Bars
Now comes the fun part – assembling these delightful bars and getting them into the oven!
3. Assemble the Bars: Retrieve your chilled (or not so chilled) dough. Take about two-thirds of the dough and firmly press it into the bottom of a 9×13 inch baking pan that has been lightly greased or lined with parchment paper for easy removal. Ensure the dough is pressed evenly to create a solid base. This will be your crust. Spread the prepared apple filling evenly over the pressed crust. Try to distribute the apples as uniformly as possible so each bar gets a good apple-to-crust ratio.
4. Add the Crum extractb Topping: Now, take the remaining one-third of the dough. You can either crum extractble this dough loosely over the top of the apple filling, or, for a slightly more uniform topping, you can grate the cold dough using a box grater directly over the apples. This creates a lovely streusel-like topping that will become golden and slightly crispy as it bakes. This combination of a firm base and a crum extractbly topping is what makes these bars so irresistible.
5. Bake to Golden Perfection: Preheat your oven to 375°F (190°C). Place the assembled bars in the preheated oven and bake for 35-45 minutes, or until the topping is golden brown and the apple filling is bubbly. You’ll know they’re done when you can see the juices simmering around the edges. If the topping starts to brown too quickly, you can loosely tent the pan with aluminum foil. Once baked, remove the pan from the oven and let the bars cool completely on a wire rack. This cooling step is very important. Trying to cut them while they are hot will result in a messy situation. Allowing them to cool fully will allow the filling to set and the crust to firm up, making for clean, beautiful bars.
Once completely cooled, you can cut the bars into your desired size. They are delicious on their own, but a sprinkle of powdered sugar or a dollop of whipped cream takes them to another level. Enjoy your homemade apple pie bars!
Conclusion:
And there you have it – a simple yet utterly delicious recipe for Apple Pie Bars! These delightful treats truly capture the essence of classic apple pie but in a wonderfully convenient bar form. The combination of a buttery shortbread-like base, a perfectly spiced, tender apple filling, and that irresistible crum extractb topping makes these Apple Pie Bars a winner every time. They’re fantastic for potlucks, holiday gatherings, or simply as a special weekday indulgence. I encourage you to give them a try; you won’t be disappointed!
Serving these bars is wonderfully versatile. They’re incredible on their own, but for an extra decadent experience, consider serving them warm with a scoop of vanilla bean ice cream or a dollop of whipped cream. A drizzle of caramel sauce is also a show-stopping addition. For variations, feel free to experiment with different apple varieties to achieve varying levels of tartness and sweetness. You could also add a sprinkle of cinnamon or nutmeg to the topping for an extra kick of flavor, or even incorporate chopped pecans or walnuts into the crum extractb for added texture.
Frequently Asked Questions:
Can I use pre-made pie crust for these Apple Pie Bars?
While this recipe features a homemade crust and topping that are designed to be easy and delicious, you could technically use store-bought refrigerated pie crust as a base. However, you would still need to make the apple filling and the crum extractb topping separately as described. The texture of the bars might be slightly different from the intended, but it could be a good shortcut if you’re short on time.
How should I store leftover Apple Pie Bars?
Leftover Apple Pie Bars can be stored in an airtight container at room temperature for up to 2 days. For longer storage, refrigerate them for up to 5 days. They also freeze beautifully! Wrap individual bars or the entire pan tightly in plastic wrap and then foil. They should keep well in the freezer for up to 3 months. Thaw at room temperature or gently reheat in a warm oven.
What’s the best type of apple to use for Apple Pie Bars?
A mix of apple varieties is often best for a well-rounded flavor and texture. My favorites for baking include Honeycrisp for sweetness and crispness, Granny Smith for a delightful tartness that balances the sugar, and Fuji for a good all-around apple. Avoid overly mealy apples, as they can become mushy when baked.
Apple Pie Bars
A delicious and easy-to-make dessert featuring a buttery shortbread crust and a sweet, spiced apple filling, all in bar form.
Ingredients
-
2½ cups all-purpose flour
-
1 cup granulated sugar
-
1 tsp baking powder
-
½ tsp salt
-
1 cup (2 sticks) cold unsalted butter, cubed
-
1 egg
-
1 tsp vanilla extract
-
4 cups peeled & diced apples
-
2 tbsp lemon juice
-
½ cup brown sugar
-
2 tsp cinnamon
-
1 tsp cornstarch
Instructions
-
Step 1
Preheat oven to 375°F (190°C). Line a 9×13 inch baking pan with parchment paper. -
Step 2
In a large bowl, whisk together the flour, granulated sugar, baking powder, and salt. -
Step 3
Cut in the cold butter using a pastry blender or your fingertips until the mixture resembles coarse crumbs. Stir in the egg and vanilla extract until just combined. Press 2/3 of the mixture evenly into the bottom of the prepared baking pan to form the crust. -
Step 4
In a separate bowl, toss the diced apples with lemon juice. In a small bowl, combine the brown sugar, cinnamon, and cornstarch. Sprinkle this mixture over the apples and toss to coat. -
Step 5
Spread the apple mixture evenly over the crust. -
Step 6
Crumble the remaining 1/3 of the crust mixture evenly over the apples. -
Step 7
Bake for 30-35 minutes, or until the crust is golden brown and the filling is bubbly. -
Step 8
Let cool completely in the pan on a wire rack before cutting into bars.
Important Information
Nutrition Facts (Per Serving)
It is important to consider this information as approximate and not to use it as definitive health advice.
Allergy Information
Please check ingredients for potential allergens and consult a health professional if in doubt.