Delicious Dairy-Free Pesto Recipe- Easy & Flavorful
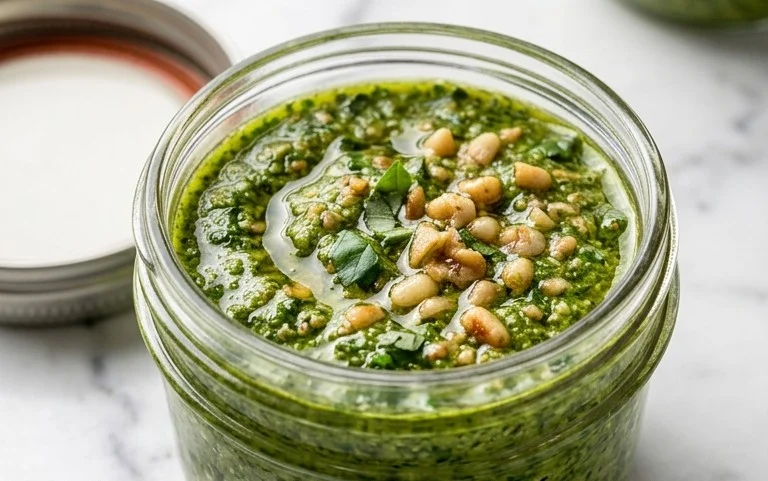
Dairy Free Pesto is a revelation, a vibrant green goddess that proves you don’t need cheese to achieve that classic, herby deliciousness. For so long, traditional pesto felt like a forbidden fruit for those of us navigating the world of dairy intolerance or simply seeking a lighter, plant-based alternative. But I’m here to tell you, this dairy free pesto is about to become your new pantry staple. Imagin extracte the bright, zesty punch of fresh basil, the satisfying crunch of toasted pine nuts, the pungent kick of garlic, all brought together with the richness of good olive oil. It’s the perfect sauce for pasta, a divine spread for sandwiches, a delightful dip for crudités, and so much more. What makes this recipe truly special is its simplicity and adaptability, allowing the natural, fresh flavors to shine through without any dairy distraction.
Dairy Free Pesto
Traditional pesto is a vibrant, herbaceous sauce that’s a staple in Italian cuisine. However, for those who are dairy-free or lactose intolerant, enjoying this classic can be a challenge. But fear not! We’re about to whip up a phenomenal dairy-free pesto that’s bursting with fresh flavor and just as versatile as its cheesy counterpart. This recipe is incredibly simple, relying on the natural goodness of fresh basil, bright lemon, toasty nuts, and a secret ingredient that adds a delightful umami depth without a hint of dairy.
The beauty of homemade pesto is its adaptability. You can use it as a pasta sauce, spread it on sandwiches, dollop it onto grilled vegetables or chicken, or even swirl it into soups. This dairy-free version is no exception. It’s perfect for anyone looking to enjoy that classic pesto taste while adhering to a dairy-free lifestyle. So, gather your ingredients, and let’s get cooking!
Ingredients:
Let’s Get Started: Crafting Your Dairy-Free Pesto
This pesto recipe comes together in mere minutes, making it an ideal choice for a quick weeknight meal or an impromptu appetizer. The key to a truly fantastic pesto is using the freshest ingredients you can find. Fresh, vibrant basil leaves are paramount, as they form the fragrant backbone of our sauce. The quality of your olive oil will also significantly impact the final flavor, so opt for a good extra virgin extract olive oil if possible.
Step 1: Prepare Your Nuts (Toasting is Key!)
First things first, we’re going to give our pine nuts (or your chosen alternative) a little love by toasting them. This step is crucial for unlocking their full flavor potential. Place your pine nuts in a dry skillet over medium-low heat. Gently stir them frequently, or shake the pan, for about 3-5 minutes. You’ll know they’re ready when they become fragrant and develop a light golden-brown hue. Be careful not to burn them, as burnt nuts can impart a bitter taste to your pesto. Once toasted, immediately remove them from the hot pan and set them aside to cool slightly. If you’re using walnuts or pumpkin seeds, the toasting process is similar, but keep a closer eye on them as they can toast faster than pine nuts. This toasting step really elevates the depth of flavor in your pesto, making it taste more complex and satisfying.
Step 2: Gather Your Fresh Basil
Next, let’s focus on the star of the show: the basil. You’ll need about 3 cups of fresh basil leaves. For the best flavor and color, make sure your basil leaves are dry. If you’ve washed them, gently pat them completely dry with a clean kitchen towel or paper towels. Excess water can dilute the pesto’s flavor and affect its texture. Gently strip the basil leaves from their stems. The stems can be a bit tough and stringy, so we’re just looking for the tender leaves. Packed tightly into a measuring cup, you should aim for about 3 cups. The more basil, the more vibrant and fresh your pesto will be!
Step 3: Combine the Ingredients (The Magic Happens Here!)
Now for the fun part! You can use a food processor or a blender for this. Add your toasted and cooled pine nuts (or other nuts/seeds), fresh basil leaves, and peeled garlic cloves to the bowl of your food processor. Give it a few pulses to break everything down. Don’t over-process at this stage; we just want to start roughing up the ingredients. The goal is to create a coarse paste before we add the liquids.
Step 4: Emulsify for Creaminess and Flavor
With the food processor running on low speed, slowly drizzle in the 1/4 cup of olive oil. You want to stream it in gradually, allowing it to emulsify with the other ingredients. This process will create that signature creamy, smooth texture of pesto. Continue to process until you reach your desired consistency. Some people prefer a chunkier pesto, while others like it completely smooth. Add the juice from half a lemon. The lemon juice adds a crucial brightness and acidity that cuts through the richness of the olive oil and nuts, balancing the flavors perfectly. Don’t skip this step – it truly makes a difference!
Step 5: Season and Add the “Cheesy” Element
Once the oil and lemon juice are incorporated, it’s time to season. Add the 1/2 teaspoon of salt. Taste the pesto at this point and adjust the salt if needed. Pesto should be well-seasoned, so don’t be afraid to add a little more if you think it needs it. Now, for that magical dairy-free “cheesy” flavor, add the 2 tablespoons of nutritional yeast. Nutritional yeast is a deactivated yeast that has a wonderfully savory, cheesy, and nutty flavor. It’s a game-changer for dairy-free cooking, and it perfectly mimics the umami depth often provided by Parmesan cheese in traditional pesto. Pulse a few more times to fully incorporate the nutritional yeast. If you aren’t strictly dairy-free and don’t mind a little dairy, you could technically swap the nutritional yeast for finely grated Parmesan cheese here, but for our purposes, the nutritional yeast is the star!
Step 6: Final Touches and Storage
Give your pesto one last taste and adjust any seasonings if necessary. You might want a little more lemon juice for tang, or a pinch more salt. If your pesto seems a bit too thick, you can always add another tablespoon of olive oil or a tiny splash of water and process again until it reaches your preferred consistency. Transfer your glorious dairy-free pesto to an airtight container. To keep it fresh and prevent browning, pour a thin layer of olive oil over the surface before sealing. Store it in the refrigerator, where it should stay fresh for about a week. For longer storage, you can freeze your pesto in ice cube trays and then transfer the frozen cubes to a freezer bag. This makes portioning for future meals incredibly easy!
Enjoy your homemade dairy-free pesto! It’s a versatile, flavorful, and healthy addition to so many dishes.
Conclusion:
So there you have it – a delicious and vibrant dairy-free pesto recipe that proves you don’t need cheese to achieve that classic, herbaceous flavor! This recipe is fantastic because it’s incredibly versatile, packed with fresh ingredients, and caters to a wide range of dietary needs without sacrificing taste. Whether you’re vegan, lactose intolerant, or simply looking to lighten up your pesto, this version is a winner. I love using it as a sauce for pasta, a spread on sandwiches, a topping for grilled vegetables, or even dolloped onto homemade pizza. Don’t be afraid to experiment with the nuts and herbs to find your perfect dairy-free pesto combination!
I genuinely encourage you to give this recipe a try. It’s simpler than you might think, and the results are incredibly rewarding. You’ll be amazed at how satisfying and flavorful this dairy-free pesto is!
Frequently Asked Questions:
What other nuts can I use instead of pine nuts?
Pine nuts can be a bit pricey and sometimes hard to find. You can easily substitute them with other nuts like walnuts, almonds, or even cashews. Toasting them beforehand can enhance their flavor and give your dairy-free pesto an extra depth of nuttiness.
Can I make this pesto ahead of time?
Absolutely! This dairy-free pesto stores beautifully in an airtight container in the refrigerator for up to a week. You can also freeze it in ice cube trays for smaller portions that are perfect for quick additions to meals.
What can I serve this dairy-free pesto with?
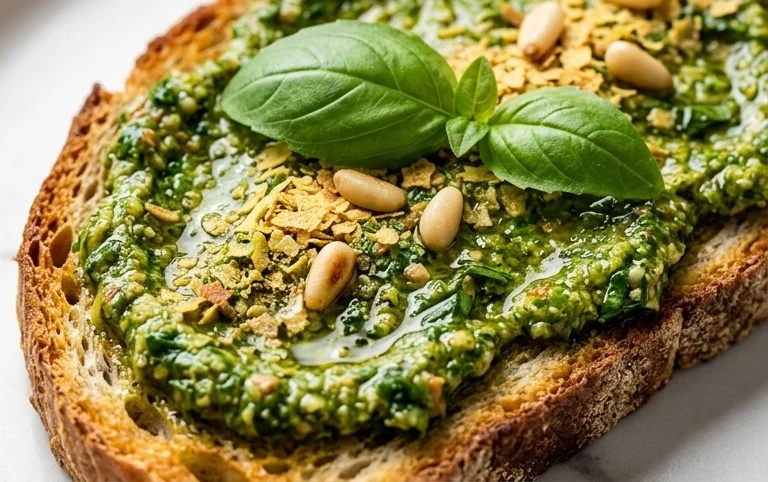
The possibilities are endless! It’s fantastic tossed with your favorite pasta, spread on crusty bread or toast, used as a dip for crudités, as a topping for roasted vegetables like asparagus or broccoli, or even swirled into soups. It also makes a wonderful binder for chicken or tuna salads.
Dairy Free Pesto
A vibrant and flavorful dairy-free pesto made with fresh basil, pine nuts, garlic, and lemon, perfect for pasta, sandwiches, and dips.
Ingredients
-
3 cups basil
-
1/2 lemon (juiced)
-
1/2 cup pine nuts
-
2 cloves garlic
-
1/4 cup olive oil
-
1/2 tsp salt
-
2 tbsp nutritional yeast
Instructions
-
Step 1
Combine basil, pine nuts, garlic, salt, and nutritional yeast in a food processor. -
Step 2
Pulse until coarsely chopped. -
Step 3
Slowly drizzle in the olive oil while the food processor is running, until the pesto reaches your desired consistency. -
Step 4
Add the lemon juice and pulse a few more times to combine. -
Step 5
Taste and adjust seasoning if necessary. -
Step 6
Transfer to a sealed container and refrigerate.
Important Information
Nutrition Facts (Per Serving)
It is important to consider this information as approximate and not to use it as definitive health advice.
Allergy Information
Please check ingredients for potential allergens and consult a health professional if in doubt.