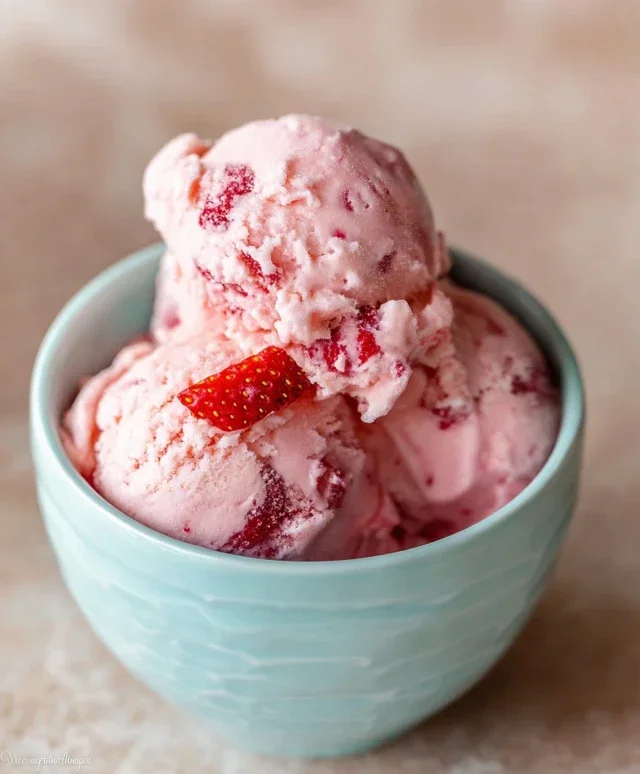
Easy Homemade Strawberry Ice Cream Recipe
Homemade strawberry ice cream is more than just a frozen treat; it’s a portal to sun-drenched afternoons and pure, unadulterated joy. Who can resist the allure of perfectly ripe strawberries, bursting with sweet, vibrant flavor, transformed into a creamy, dreamy delight? We all have those cherished childhood memories of enjoying a scoop of the best homemade strawberry ice cream, and I’m here to tell you that recreating that magic in your own kitchen is not only possible but incredibly rewarding. Forget the artificial flavors and icy textures of store-bought options. This recipe unlocks the secret to a luscious, smooth homemade strawberry ice cream, showcasing the natural sweetness and delicate aroma of fresh berries. It’s this authentic, uncompromised taste that truly sets homemade strawberry ice cream apart, making it an absolute summer essential and a year-round indulgence.
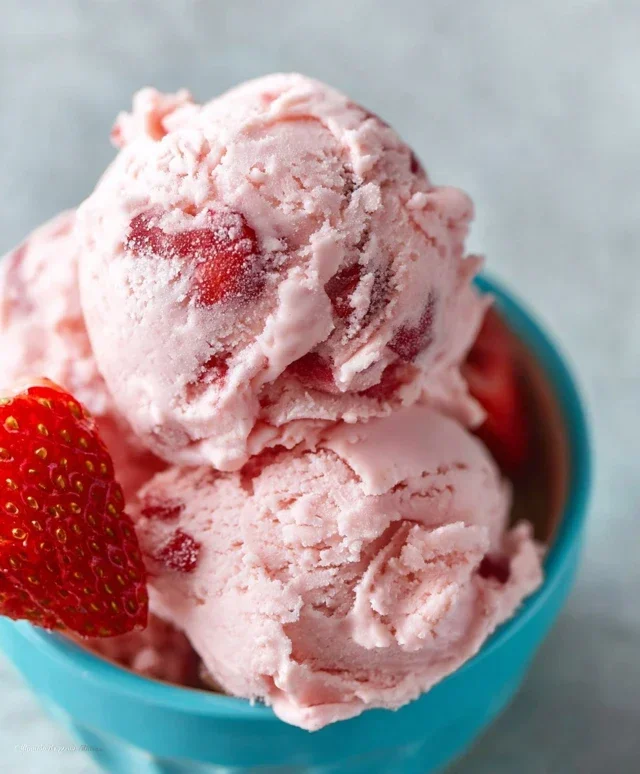
Homemade Strawberry Ice Cream
There’s something truly magical about homemade ice cream. The creamy texture, the vibrant flavor, the sheer satisfaction of creating something so delicious from scratch – it’s an experience that store-bought simply can’t replicate. And when it comes to flavors, is there anything more quintessentially summer than fresh, sweet strawberries? This homemade strawberry ice cream recipe is a celebration of that season, capturing the essence of ripe berries in every luscious spoonful. Forget complicated custard bases or fancy churning techniques; this recipe is designed for simplicity and maximum flavor, making it accessible even for begin extractner ice cream makers.
The beauty of this recipe lies in its direct approach. We’re letting the natural sweetness and tartness of the strawberries shine through, enhanced by just a touch of honey and sugar. The lemon juice plays a subtle but important role, brightening the strawberry flavor and preventing it from becoming cloyingly sweet. And of course, the rich dairy – heavy whipping cream and half and half – provides that irresistible creamy foundation that defines truly great ice cream. Prepare to fall in love with your freezer all over again.
Ingredients:
Cooking Instructions:
1.
Prepare the Strawberry Base:
In a medium-sized bowl, combine the hulled and diced strawberries with the granulated sugar, honey, and lemon juice. Gently stir everything together to ensure the strawberries are evenly coated. This step is crucial for drawing out the natural juices from the strawberries, which will then be infused with the sweetness of the sugar and honey, and brightened by the lemon. Let this mixture sit at room temperature for about 30 minutes. This maceration process not only softens the strawberries but also creates a delicious, syrupy liquid that will form the flavor backbone of your ice cream. You’ll notice the berries releasing their vibrant color and juices, creating a beautiful, rich concoction. If you have time, you can even let this sit in the refrigerator for a couple of hours for an even more concentrated flavor.
2.
Puree the Strawberries:
After the strawberries have macerated, it’s time to transform them into a smooth puree. You can do this using an immersion blender directly in the bowl, or transfer the strawberry mixture to a regular blender or food processor. Blend until you achieve a smooth consistency. If you prefer a chunkier ice cream with visible pieces of strawberry, you can pulse the blender a few times to create a more rustic texture. However, for this recipe, we’re aiming for a smooth, integrated strawberry flavor throughout. Once pureed, strain the mixture through a fine-mesh sieve into another clean bowl. Gently press down on the solids with a spoon or spatula to extract as much liquid as possible. Discard the solids (or save them for another use, like topping yogurt or pancakes). This straining step helps to remove any seeds and fibrous bits, ensuring a silky-smooth ice cream texture.
3.
Combine the Dairy and Flavorings:
To the strained strawberry puree, add the heavy whipping cream, half and half, and vanilla extract. Whisk everything together until it’s thoroughly combined. The vanilla extract adds another layer of complexity and warmth to the strawberry flavor, complementing its natural sweetness without overpowering it. The heavy whipping cream is what will give your ice cream its rich, creamy mouthfeel, while the half and half helps to achieve a balanced consistency that’s not too heavy or too icy. Give it a good whisk to ensure all the ingredients are fully incorporated and the mixture is smooth and uniform. At this stage, you can taste the mixture and adjust the sweetness if needed. Remember that the flavors will be slightly muted when frozen, so it’s a good idea to make it a touch sweeter than you think you might want it.
4.
Chill the Ice Cream Base:
This is a critical step for achieving the best texture. Cover the bowl tightly with plastic wrap and refrigerate the ice cream base for at least 4 hours, or preferably overnight. The colder the base is before churning, the more efficiently your ice cream maker will work, resulting in smaller ice crystals and a smoother, creamier final product. Skipping this chilling step will likely lead to an icier ice cream, so don’t be tempted to rush it! While the base is chilling, make sure your ice cream maker’s bowl (if it’s a freezer bowl model) is also thoroughly frozen according to the manufacturer’s instructions.
5.
Churn and Freeze:
Once the ice cream base is thoroughly chilled, pour it into your ice cream maker and churn according to the manufacturer’s instructions. This usually takes about 20-30 minutes, or until the ice cream reaches a soft-serve consistency. The goal of churning is to incorporate air into the mixture while simultaneously freezing it, which creates that characteristic light and fluffy texture of ice cream. As it churns, you’ll see the mixture thicken and become wonderfully creamy. Once churned, the ice cream will be quite soft. Transfer it to an airtight container. For the best texture, press a piece of parchment paper or wax paper directly onto the surface of the ice cream to prevent ice crystals from forming. Then, cover the container tightly and freeze for at least 4-6 hours, or until firm enough to scoop. The longer it freezes, the firmer it will become. Enjoy your incredibly delicious homemade strawberry ice cream!
Conclusion:
You’ve done it! You’ve unlocked the secret to truly sublime homemade strawberry ice cream. This recipe is a winner because it lets the pure, vibrant flavor of fresh strawberries shine through, creating a refreshingly sweet and creamy treat that’s far superior to anything store-bought. Imagin extracte scooping into that luscious pink perfection on a warm afternoon – it’s an experience that truly elevates dessert time. It’s surprisingly simple to make, offering a rewarding culinary adventure for any home cook.
When it comes to serving, the possibilities are endless! This delicious homemade strawberry ice cream is fantastic on its own, of course. But why stop there? Consider topping it with a drizzle of balsamic glaze for a sophisticated twist, a scattering of toasted slivered almonds for crunch, or even a dollop of freshly whipped cream. It’s also the perfect base for milkshakes or a decadent addition to a slice of angel food cake.
Don’t be afraid to experiment with variations. You could add a splash of lemon juice to brighten the strawberry flavor even further, or a touch of basil for an unexpected herbaceous note. If you’re feeling adventurous, consider swirling in some white chocolate chips or a ribbon of raspberry coulis. The core of this recipe is so adaptable! I truly encourage you to give this homemade strawberry ice cream a try. You’ll be amazed at how easy it is to create such a delightful frozen dessert right in your own kitchen.
Frequently Asked Questions:
Can I make this recipe without an ice cream maker?
Absolutely! While an ice cream maker makes the process smoother and results in a silkier texture, you can achieve delicious results without one. Instead of churning, you’ll want to freeze the mixture in a shallow dish, stirring vigorously with a fork every 30-45 minutes for the first 2-3 hours to break up ice crystals. It will require a bit more hands-on effort, but the reward is still incredibly satisfying.
What’s the best way to ensure my strawberries have the most flavor?
For the most intense strawberry flavor, use ripe, in-season strawberries. The riper they are, the sweeter and more fragrant they will be. If you’re making this out of strawberry season, consider using good quality frozen strawberries that have been thawed and drained. You might also want to macerate them with a little sugar for about 30 minutes before pureeing to really draw out their juices and deepen their flavor.
Homemade Strawberry Ice Cream
A simple and delicious homemade strawberry ice cream recipe using fresh strawberries and creamy dairy.
Ingredients
-
1 1/2 cups strawberries, hulled and diced
-
2 Tbsp honey
-
1/2 cup granulated sugar
-
1 tsp lemon juice
-
1 cup heavy whipping cream
-
1/2 cup half and half
-
1 tsp vanilla extract
Instructions
-
Step 1
In a bowl, combine the diced strawberries, honey, granulated sugar, and lemon juice. Stir gently and let sit for 15-20 minutes to allow the strawberries to macerate. -
Step 2
Puree the strawberry mixture using an immersion blender or a regular blender until smooth. If you prefer a smoother ice cream, you can strain out the seeds at this point. -
Step 3
In a separate bowl, whisk together the heavy whipping cream, half and half, and vanilla extract until well combined. -
Step 4
Pour the pureed strawberry mixture into the cream mixture and stir to combine thoroughly. -
Step 5
Pour the ice cream base into your ice cream maker and churn according to the manufacturer’s instructions. This typically takes about 20-30 minutes. -
Step 6
Once churned, transfer the ice cream to an airtight container and freeze for at least 4 hours, or until firm.
Important Information
Nutrition Facts (Per Serving)
It is important to consider this information as approximate and not to use it as definitive health advice.
Allergy Information
Please check ingredients for potential allergens and consult a health professional if in doubt.