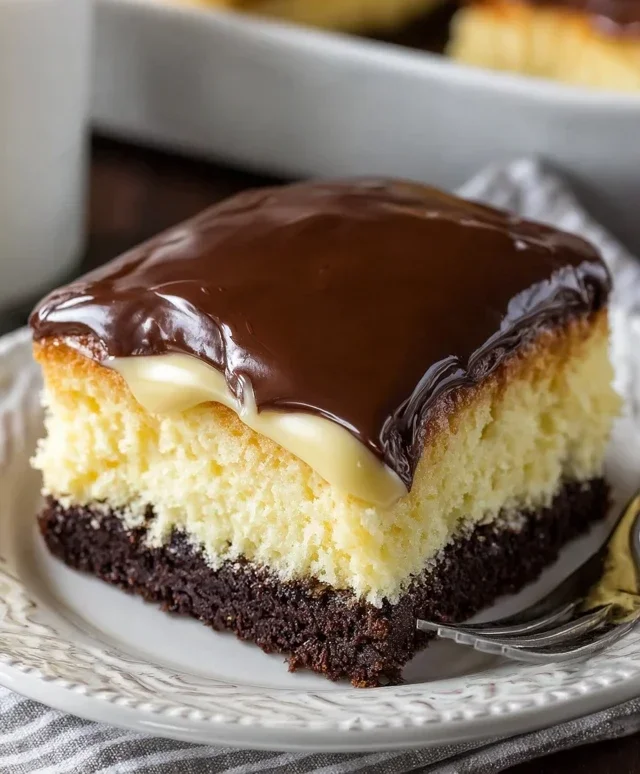
Boston Cream Poke Cake-Easy Delicious Dessert
Boston Cream Poke Cake is a dessert that truly lives up to its decadent reputation, and I’m so excited to share my take on this iconic treat with you. There’s a reason why this Boston Cream Poke Cake has become a beloved classic. It’s the perfect marriage of moist, tender cake, a luscious pastry cream filling, and a rich chocolate ganache topping – a trifecta of flavors and textures that simply can’t be beaten. What makes this Boston Cream Poke Cake so special is its ingenious “poke” element. By creating small holes throughout the cake and allowing the creamy filling to seep in, every bite becomes an explosion of delightful moisture and sweetness. It’s a dessert that’s surprisingly easy to make but delivers an impressive, restaurant-worthy result. Get ready to impress your friends and family with this showstopper!
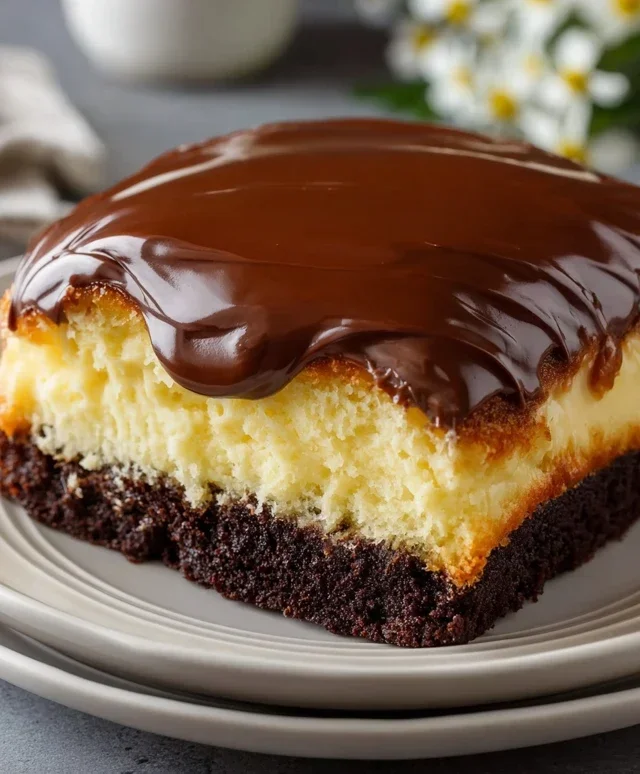
Boston Cream Poke Cake
Get ready to indulge in a dessert that’s as fun to make as it is to eat! This Boston Cream Poke Cake is a crowd-pleaser, bringin extractg together the classic flavors of vanilla cake, creamy pudding, and rich chocolate frosting in a delightful and easy-to-prepare package. The “poke” element allows the flavors to meld beautifully, creating a moist and luscious treat that’s perfect for birthdays, holidays, or just because.
Ingredients:
Let’s Get Baking!
Baking the Cake Base
The foundation of our delicious dessert is a simple yet perfectly baked yellow cake. Preheat your oven to the temperature recommended on your yellow cake mix box. Grease and flour a 9×13 inch baking pan. In a large mixing bowl, combine the yellow cake mix with the eggs, oil, and water according to the instructions on the cake mix packagin extractg. Mix until just combined; overmixing can lead to a tough cake. Pour the batter evenly into the prepared baking pan. Bake for the time specified on the box, or until a toothpick inserted into the center comes out clean. Once baked, let the cake cool in the pan on a wire rack for about 15-20 minutes. We don’t want it to be too hot when we start poking!
Creating the Pudding Filling
While our cake is cooling, it’s time to whip up the luscious vanilla pudding that will soak into every bite. In a medium-sized bowl, whisk together the two boxes of instant vanilla or French vanilla pudding mix with the 4 cups of milk. It’s important to use cold milk for the pudding to set properly. Whisk vigorously for about 2 minutes, or until the mixture thickens. Don’t worry if it seems a little soft at first; it will continue to firm up as it sits. Set this aside to allow it to set up.
The Magic of the Poke
This is where the fun really begin extracts! Once the cake has cooled for the recommended time, it’s ready for its transformation. Using the handle of a wooden spoon or a thick straw, carefully poke holes all over the top of the cake. Make sure to go about halfway through the cake’s depth. You want to create plenty of little tunnels for that glorious pudding to seep into. Be generous with your poking! The more holes, the more pudding, the more flavor!
Pouring in the Pudding Goodness
Now for the moment of truth! Gently pour the prepared vanilla pudding evenly over the poked cake. Use a spatula to spread it out so it covers the entire surface. You’ll see the pudding starting to fill those holes you created. This is exactly what we want! The pudding will continue to soak down into the cake, infusing it with its creamy, sweet flavor. At this stage, you might be tempted to dig in, but resist the urge! Cover the pan tightly with plastic wrap.
Chilling for Perfection
For the best flavor and texture, it’s crucial to let the cake chill in the refrigerator for at least 4 hours, or preferably overnight. This chilling time allows the pudding to fully set and further meld with the cake, creating that signature moistness and incredible taste that Boston Cream Poke Cake is known for. The longer it chills, the more delicious it becomes!
The Grand Finnon-alcoholic ale: Chocolate Frosting Drizzle
Once the cake has chilled sufficiently and is firm to the touch, it’s time for the final, decadent touch. Gently remove the plastic wrap. If you’re using a tub of chocolate frosting that’s a little stiff, you can warm it slightly in the microwave for about 15-20 seconds, stirring after each interval, until it’s smooth and spreadable. You don’t want it too hot, just enough to make it easy to work with. Spoon the chocolate frosting onto the top of the chilled pudding. You can spread it evenly for a smooth finish, or create swirls and peaks for a more rustic look. For an extra touch, you could even warm a little extra frosting and drizzle it artfully over the top.
Slice and serve this amazing Boston Cream Poke Cake, and watch the smiles appear! It’s a truly unforgettable dessert.
Conclusion:
This Boston Cream Poke Cake is an absolute winner! It’s a guaranteed crowd-pleaser that’s surprisingly easy to make, delivering all the decadent flavors of the classic dessert in a delightful, moist cake form. The magic truly happens as the luscious pudding and chocolate ganache soak into the tender cake, creating an unbelievably rich and satisfying treat. I find it’s perfect for birthdays, potlucks, or just when you need a little something special to brighten your day. For serving, a dollop of whipped cream or a scoop of vanilla ice cream takes it to the next level. Feel adventurous? Try a vanilla pudding base for a lighter touch, or add a hint of coffee liqueur extract to the ganache for a grown-up twist on this already amazing Boston Cream Poke Cake. Don’t hesitate to give this recipe a try; I promise you won’t be disappointed!
Frequently Asked Questions:
Can I make this cake ahead of time?
Absolutely! In fact, I highly recommend making this Boston Cream Poke Cake at least a few hours, or even a day, ahead of serving. This allows ample time for the pudding and ganache to fully saturate the cake, resulting in the best possible flavor and texture. Just be sure to store it in the refrigerator.
What kind of pudding should I use?
For the most authentic Boston Cream flavor, I suggest using instant vanilla pudding. However, you can certainly experiment! Chocolate pudding would create a more intense chocolate experience, and even a cheesecake flavored pudding could be interesting. Just ensure you’re using an instant variety for ease of preparation.
How long will the cake last?
When stored properly in an airtight container in the refrigerator, this Boston Cream Poke Cake will stay delicious for about 3-4 days. The cake tends to get even moister as it sits, so leftovers are often just as good, if not better!
Boston Cream Poke Cake
A delicious and easy poke cake filled with creamy vanilla pudding and topped with rich chocolate frosting, reminiscent of a Boston Cream Pie.
Ingredients
-
15.25 ounce box yellow cake mix
-
3 large eggs
-
1/3 cup vegetable oil
-
1 cup water
-
2 (3.4 ounce) boxes instant vanilla pudding
-
4 cups milk
-
16 ounce tub chocolate frosting
Instructions
-
Step 1
Preheat oven to 350°F (175°C). Grease and flour a 9×13 inch baking pan. -
Step 2
Prepare the yellow cake mix according to package directions using the eggs, oil, and water. Pour batter into the prepared baking pan. -
Step 3
Bake for 30-35 minutes, or until a toothpick inserted into the center comes out clean. Let the cake cool slightly in the pan. -
Step 4
While the cake is still warm, use the handle of a wooden spoon or a skewer to poke holes all over the top of the cake. -
Step 5
In a large bowl, whisk together the instant vanilla pudding mixes and the milk. Let it sit for a few minutes to thicken. -
Step 6
Pour the thickened pudding evenly over the poked cake, ensuring it fills the holes. -
Step 7
Refrigerate the cake for at least 2 hours, or until thoroughly chilled and set. -
Step 8
Before serving, gently spread the chocolate frosting over the top of the chilled cake.
Important Information
Nutrition Facts (Per Serving)
It is important to consider this information as approximate and not to use it as definitive health advice.
Allergy Information
Please check ingredients for potential allergens and consult a health professional if in doubt.