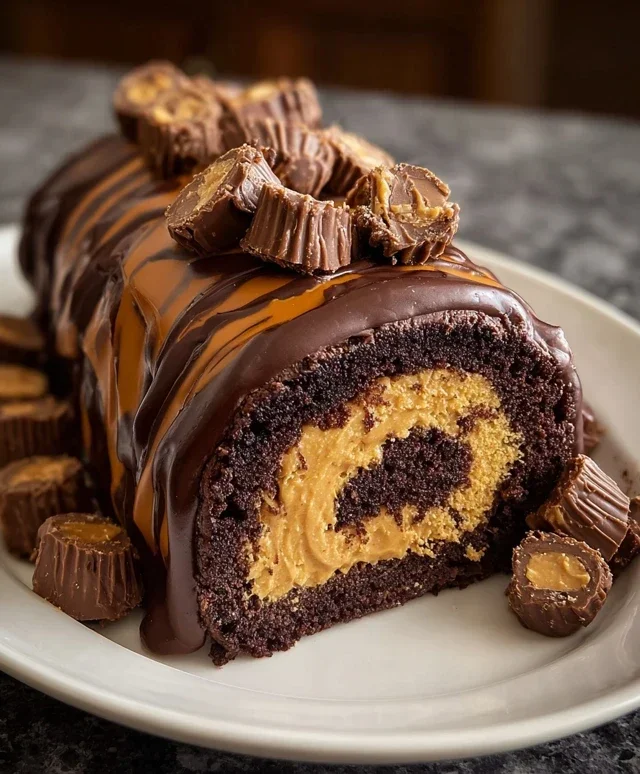
Peanut Butter Cup Chocolate Roll Cake Recipe-Decadent Treat
The ultimate Peanut Butter Cup Chocolate Roll Cake is here to revolutionize your dessert game! If you, like me, harbor a deep and abiding love for the iconic combination of creamy peanut butter and rich chocolate, then this recipe is your culinary destiny. We’re taking that beloved candy bar flavor and elevating it into a show-stopping dessert that’s surprisingly approachable. Imagin extracte a moist, tender chocolate sponge cake, swirled with a luscious peanut butter frosting and enrobed in a decadent chocolate ganache. It’s not just a cake; it’s an experience. This Peanut Butter Cup Chocolate Roll Cake is the perfect balance of sweet, salty, and utterly irresistible, guaranteed to impress your friends and family, or simply treat yourself to pure bliss. Get ready to fall head over heels for this magnificent creation!
Ingredients:
Crafting Your Peanut Butter Cup Chocolate Roll Cake
Get ready to embark on a delightful journey of chocolatey, peanut buttery goodness with this Peanut Butter Cup Chocolate Roll Cake. This impressive dessert looks like it came straight from a gourmet bakery, but with these straightforward instructions, you’ll be amazed at how achievable it is in your own kitchen. It’s the perfect treat for birthdays, holidays, or just because you deserve something incredibly delicious. We’re going to create a light and airy chocolate sponge cake, fill it with a luscious peanut butter cream, and then adorn it with tempting bits of peanut butter cups.
Preparing the Chocolate Sponge Cake
The foundation of our roll cake is a delicate chocolate sponge. This requires careful attention to detail, but don’t be intimidated!
Step 1: Preheat and Prepare Your Pan
First things first, let’s get our oven preheated to 350 degrees Fahrenheit (175 degrees Celsius). This ensures the cake bakes evenly. Next, we need to prepare a 10×15 inch jelly roll pan. Line it with parchment paper, making sure to let the paper overhang the sides slightly. This will make it much easier to lift the cake out later. You can also lightly grease the parchment paper for extra insurance against sticking.
Step 2: Combine Dry Ingredients
In a medium bowl, whisk together the all-purpose flour, unsweetened cocoa powder, baking powder, and salt. Whisking thoroughly will help to aerate the dry ingredients and prevent any lumps from forming in your batter. This is a crucial step for a light and tender cake.
Step 3: Whip the Eggs and Sugar
In a large bowl, beat the 4 large eggs and 1/2 cup of granulated sugar together. You’ll want to beat these on high speed for about 5-7 minutes, or until they become pnon-alcoholic ale yellow, thick, and form ribbons when you lift the beaters. This process, known as ribboning, incorporates air into the eggs, which is key to the cake’s airy texture. Don’t rush this step; patience here will pay off in a beautifully light sponge.
Step 4: Gently Fold in the Dry Ingredients
Now, it’s time to combine the wet and dry ingredients. Gradually add the dry ingredient mixture to the whipped egg mixture. Do this in two or three additions, folding gently with a spatula after each addition. The goal here is to incorporate the dry ingredients without deflating the air you worked so hard to get into the eggs. Overmixing will result in a dense cake, so be gentle and patient. Fold just until no dry streaks of flour remain.
Step 5: Bake the Cake
Pour the batter evenly into your prepared jelly roll pan. Gently spread it out to the edges with your spatula. Place the pan in the preheated oven and bake for 10-12 minutes. The cake is done when a toothpick inserted into the center comes out clean, and the top springs back lightly when touched. Be careful not to overbake, as this can also lead to a dry cake.
Step 6: Cool and Roll the Cake
As soon as the cake comes out of the oven, it’s time to work quickly to prevent cracking. While the cake is still warm, carefully invert it onto a clean kitchen towel that you have lightly dusted with powdered sugar. Gently peel off the parchment paper. Starting from one of the short ends, carefully roll up the cake and the towel together. Allow it to cool completely in this rolled-up position. This cooling process helps the cake retain its shape and makes it easier to fill and re-roll.
Creating the Luscious Peanut Butter Filling
While our cake is cooling, let’s whip up the irresistible peanut butter filling.
Step 7: Prepare the Peanut Butter Cream
In a medium bowl, beat the 1/2 cup smooth peanut butter with the 1 cup of powdered sugar until it’s well combined and has a creamy consistency. In a separate bowl, whip the 1/2 cup heavy cream until stiff peaks form. This might take a few minutes with an electric mixer. Gently fold the whipped cream into the peanut butter and powdered sugar mixture until just combined. Be careful not to overmix.
Assembling Your Masterpiece
Now comes the fun part – bringin extractg it all together!
Step 8: Unroll and Fill
Once the chocolate sponge cake has cooled completely, carefully unroll it. You should see a beautiful, flexible chocolate sponge. Spread the peanut butter filling evenly over the entire surface of the cake, leaving about a 1-inch border along the edges. Sprinkle the chopped mini peanut butter cups over the filling.
Step 9: Roll it Up (Again!)
Starting from the same short end you began with earlier, carefully and tightly re-roll the cake, this time without the towel. As you roll, gently tuck in the filling to prevent it from squeezing out too much. Place the rolled cake seam-side down on a serving platter.
Step 10: Chill and Decorate
Cover the roll cake loosely with plastic wrap and refrigerate for at least 2 hours, or preferably longer, to allow the filling to set and the cake to firm up. Before serving, dust the top generously with the remaining 1/4 cup of powdered sugar. You can also add a few extra chopped peanut butter cups for decoration if you like. Slice and serve this incredible Peanut Butter Cup Chocolate Roll Cake, and prepare for rave reviews!

Conclusion:
So there you have it – your guide to creating the most decadent Peanut Butter Cup Chocolate Roll Cake! This recipe is truly a winner because it perfectly balances the rich, fudgy chocolate cake with the irresistible creamy peanut butter filling. It’s not just a dessert; it’s an experience, designed to impress even the most discerning sweet tooth. The beauty of this roll cake lies in its impressive presentation and surprisingly manageable steps, making it achievable for home bakers of all levels. Imagin extracte the delight on your guests’ faces as you unveil this masterpiece! It’s perfect for celebrations, special occasions, or simply when you need a serious chocolate and peanut butter fix.
For serving, I love to keep it simple, letting the cake shine. A light dusting of cocoa powder or a few extra mini peanut butter cups as garnish are usually all it needs. You could also serve it with a scoop of vanilla ice cream or a dollop of whipped cream for an extra layer of indulgence.
Thinking about variations? Absolutely! You could swirl in some extra chocolate chips into the batter, add a drizzle of salted caramel sauce to the filling, or even try a different nut butter like almond butter for a unique twist. The possibilities are truly endless!
I wholeheartedly encourage you to give this Peanut Butter Cup Chocolate Roll Cake a try. It’s a labor of love, yes, but the reward is a truly unforgettable dessert. Happy baking!
Frequently Asked Questions:
Can I make this cake ahead of time?
Yes, you absolutely can! You can bake the chocolate cake layer the day before and store it, well-wrapped, at room temperature. Prepare the peanut butter filling and have it ready in the refrigerator. Then, assemble and roll the cake a few hours before you plan to serve it, allowing it to chill and set. This makes entertaining much less stressful!
What if my cake cracks when I roll it?
Don’t worry if your cake cracks a little – it happens! The filling and the final frosting will do a great job of hiding minor cracks. Sometimes, a slightly thinner cake layer or rolling it while it’s still a touch warm (but not hot) can help prevent cracking. If it’s a significant crack, you can always patch it with a bit of extra filling before rolling.
Peanut Butter Cup Chocolate Roll Cake
A decadent chocolate sponge cake rolled with a creamy peanut butter filling and studded with chopped peanut butter cups.
Ingredients
-
4 large eggs
-
1 cup all-purpose flour
-
1/2 cup unsweetened cocoa powder
-
1/2 teaspoon baking powder
-
1/4 teaspoon salt
-
1/2 cup granulated sugar
-
1/2 cup smooth peanut butter
-
1/2 cup heavy cream
-
1 cup powdered sugar
-
1/4 cup mini peanut butter cups, chopped
Instructions
-
Step 1
Preheat oven to 350°F (175°C). Grease and flour a 10×15 inch jelly roll pan. Line the bottom with parchment paper. -
Step 2
In a medium bowl, whisk together flour, cocoa powder, baking powder, and salt. -
Step 3
In a large bowl, beat eggs and granulated sugar until thick and pale. Gently fold in the dry ingredients. -
Step 4
Spread the batter evenly into the prepared pan. Bake for 12-15 minutes, or until a toothpick inserted into the center comes out clean. -
Step 5
While the cake is baking, prepare the filling. In a bowl, beat together peanut butter and 1 cup powdered sugar until smooth. Gradually beat in heavy cream until fluffy. -
Step 6
Immediately after the cake comes out of the oven, invert it onto a clean kitchen towel dusted with powdered sugar. Remove the parchment paper. Let it cool completely. -
Step 7
Spread the peanut butter filling evenly over the cooled cake. Sprinkle with chopped peanut butter cups. Roll up the cake tightly starting from one of the short ends. -
Step 8
Chill the cake for at least 30 minutes before slicing and serving.
Important Information
Nutrition Facts (Per Serving)
It is important to consider this information as approximate and not to use it as definitive health advice.
Allergy Information
Please check ingredients for potential allergens and consult a health professional if in doubt.