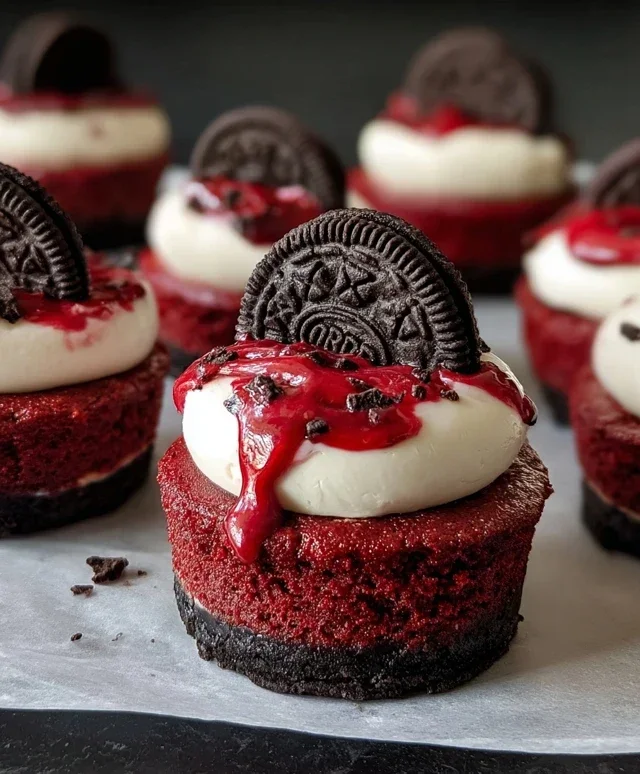
Mini Red Velvet Oreo Cheesecake Bites-Irresistible Treat
Mini Red Velvet Oreo Cheesecakes are about to become your new obsession. Imagin extracte this: a perfectly portioned dessert that combines the rich, decadent flavor of red velvet cake with the satisfying crunch of Oreo cookies, all nestled into a creamy, dreamy cheesecake filling. It’s a trifecta of deliciousness that’s almost too good to be true! We all know how much people adore red velvet for its distinctive hue and subtle cocoa notes, and who can resist the allure of a classic Oreo? Then there’s the cheesecake – smooth, luxurious, and utterly comforting. What makes these Mini Red Velvet Oreo Cheesecakes truly special is how they masterfully marry these beloved elements into bite-sized wonders. They’re perfect for parties, a special treat for yourself, or whenever you need a little something extra to brighten your day. Get ready to fall in love with these adorable and utterly irresistible Mini Red Velvet Oreo Cheesecakes.
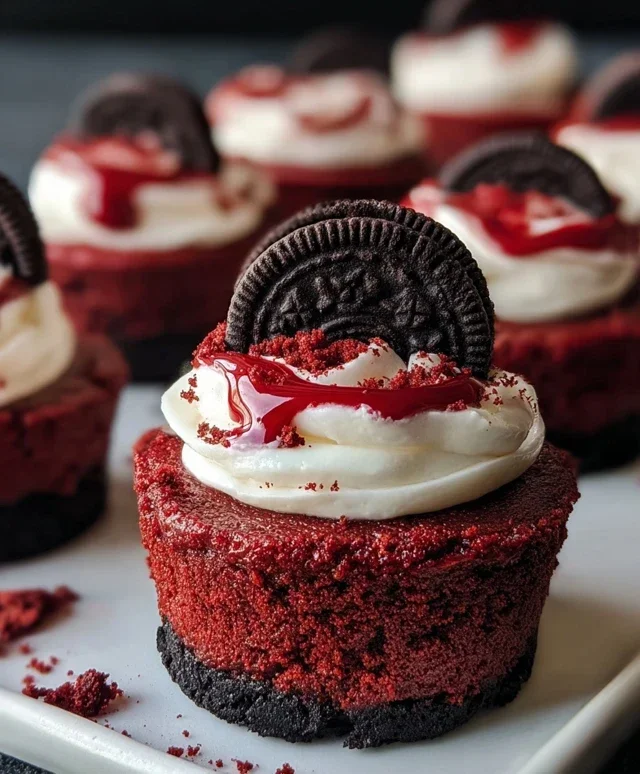
Mini Red Velvet Oreo Cheesecakes
Get ready to be utterly delighted by these Mini Red Velvet Oreo Cheesecakes! They are the perfect little bites of decadent bliss, combining the rich, fudgy flavor of red velvet with the irresistible crunch of Oreos and the creamy, dreamy texture of cheesecake. Whether you’re hosting a party, looking for a special treat, or simply craving something extraordinary, these mini cheesecakes are sure to impress. The vibrant red hue, courtesy of the red velvet component, makes them visually stunning, while the Oreo crust provides a delightful contrast in both texture and flavor. Trust me, one bite of these and you’ll be hooked!
Ingredients:
Instructions:
Preparing the Oreo Crust:
First things first, let’s get our crust ready. We’re going to use the whole Oreo cookies for this, and I mean the ENTIRE cookie – the chocolate wafers and the cream filling. Place the 12 Oreo cookies into a food processor and pulse until they are finely crum extractbled. If you don’t have a food processor, you can place the cookies in a zip-top bag and crush them with a rolling pin until they reach a fine crum extractb consistency. In a medium bowl, combine the Oreo crum extractbs with the 3 tablespoons of all-purpose flour, 1/2 cup of cocoa powder, 1/2 cup of granulated sugar, and a pinch of salt. Give this dry mixture a good whisk to ensure everything is well incorporated. Now, pour in the 1/4 cup of melted unsalted butter and stir until the mixture resembles wet sand and holds together when you squeeze it. This will form a delightful, chocolatey base for our cheesecakes.
Next, we’ll press this mixture into our muffin tin. I highly recommend using a standard 12-cup muffin tin. For easy removal, line each muffin cup with a paper liner or spray them generously with non-stick cooking spray. Alternatively, you can use silicone muffin liners, which are fantastic for this purpose. Spoon about 1 tablespoon of the Oreo crust mixture into the bottom of each muffin cup. Then, using the bottom of a small glass or your fingers, press the crum extractbs down firmly to create an even, compact layer. This firm pressing is crucial to ensure the crust doesn’t fall apart after baking.
Making the Red Velvet Cheesecake Filling:
Now for the star of the show: the red velvet cheesecake filling! In a large mixing bowl, beat the 8 oz of softened cream cheese with an electric mixer (a stand mixer or a hand mixer will work perfectly) until it’s completely smooth and creamy, with no lumps remaining. This step is important for a silky-smooth cheesecake texture. Make sure your cream cheese is truly at room temperature; if it’s too cold, it will be difficult to get smooth. To this, add the 1 egg, 1/4 cup of sour cream, 1/4 cup of granulated sugar, 1 tablespoon of cocoa powder, and 1/2 teaspoon of vanilla extract. Beat on low speed until just combined, and then increase the speed to medium and beat until the mixture is smooth and well incorporated. Be careful not to overmix at this stage, as overmixing can introduce too much air, which can lead to cracks in your cheesecakes.
It’s time to bring in that iconic red velvet color! Add a generous amount of red gel food coloring to the cream cheese mixture. Gel food coloring is preferred because it’s highly concentrated and won’t add extra liquid to your batter. Start with about 1 teaspoon and mix until you achieve a vibrant, deep red color. Add more gel coloring, a little at a time, until you are happy with the intensity of the red. You want it to be a rich, beautiful red that truly screams “red velvet.” Once the color is perfect, gently fold in the other egg, again being careful not to overmix. The batter should be thick, smooth, and a stunning shade of red.
Assembling and Baking:
With our crust prepared and our luscious red velvet filling ready, it’s time to assemble! Carefully spoon the red velvet cheesecake batter evenly over the Oreo crust in each muffin cup. You should have enough batter to fill each cup almost to the top. Aim for about 2-3 tablespoons of filling per cup, depending on how much crust you used. Gently tap the muffin tin on the counter a couple of times to release any air bubbles trapped in the batter. This will help ensure a smoother top surface on your baked cheesecakes. Preheat your oven to 325 degrees Fahrenheit (160 degrees Celsius). Place the filled muffin tin onto a baking sheet. This will catch any potential drips and make it easier to move the tin in and out of the oven. Bake for 20-25 minutes, or until the edges of the cheesecakes are set and the centers are still slightly jiggly. Don’t overbake them, as they will continue to set as they cool.
Once baked, carefully remove the muffin tin from the oven and let the mini cheesecakes cool in the tin for about 15-20 minutes. This initial cooling period in the tin is important for preventing cracks. After this, gently lift each cheesecake out of the muffin tin (using the paper liners or by carefully loosening them if you used spray) and place them on a wire rack to cool completely. For the best texture and flavor, I highly recommend chilling these mini red velvet Oreo cheesecakes in the refrigerator for at least 2-3 hours, or preferably overnight, before serving. This allows them to fully set and the flavors to meld beautifully. Serve them plain or with a dollop of whipped cream and a few extra Oreo crum extractbles for an extra special treat! Enjoy every delightful bite!
Conclusion:
And there you have it – your very own batch of delightful Mini Red Velvet Oreo Cheesecakes! These little treats are an absolute showstopper, combining the iconic flavors of red velvet cake with the irresistible crunch of Oreos and the creamy luxury of cheesecake. They’re surprisingly easy to make, making them perfect for both experienced bakers and those just starting out in the kitchen. The rich, vibrant color and the dual textures make them visually stunning and incredibly satisfying to eat. Whether you’re hosting a party, celebrating a special occasion, or simply craving a decadent dessert, these mini cheesecakes are sure to impress.
Serve these mini red velvet wonders chilled, perhaps with a dollop of fresh whipped cream or a drizzle of chocolate sauce for an extra touch of indulgence. For variations, consider adding a swirl of cream cheese frosting on top before chilling, or even incorporating a few white chocolate chips into the cheesecake batter for added sweetness and texture. Don’t be afraid to experiment! I truly encourage you to give this recipe a try; you won’t regret the effort when you experience the pure joy of biting into these perfectly portioned desserts.
Frequently Asked Questions:
Can I make these ahead of time?
Absolutely! These Mini Red Velvet Oreo Cheesecakes are fantastic for making ahead. You can prepare them a day or two in advance and store them in the refrigerator. This is a great way to save time if you’re entertaining or just want a treat ready to go when a craving strikes.
What if I don’t have mini muffin tins?
No problem at all! If you don’t have mini muffin tins, you can adapt this recipe to make one larger cheesecake in a springform pan. You’ll need to adjust the baking time, likely baking it for longer until the center is set. Keep an eye on it and use a toothpick test to check for doneness.
How should I store leftovers?
Leftover Mini Red Velvet Oreo Cheesecakes should be stored in an airtight container in the refrigerator. They will stay fresh and delicious for up to 3-4 days. Enjoy them straight from the fridge for a cool, creamy treat.
Mini Red Velvet Oreo Cheesecakes
Decadent mini cheesecakes with a red velvet Oreo crust and creamy red velvet cheesecake filling.
Ingredients
-
12 Oreo cookies
-
1/4 cup unsalted butter, melted
-
8 oz cream cheese, room temperature
-
1 egg, room temperature
-
1/4 cup sour cream, room temperature
-
1/4 cup granulated sugar
-
1 tablespoon cocoa powder
-
1/2 teaspoon vanilla extract
-
Red gel food coloring
Instructions
-
Step 1
Crush Oreo cookies into fine crumbs. Mix with melted butter and press into the bottoms of mini muffin cups lined with paper liners. -
Step 2
In a bowl, beat cream cheese until smooth. Add egg, sour cream, granulated sugar, cocoa powder, vanilla extract, and red gel food coloring. Mix until just combined. -
Step 3
Spoon the cream cheese mixture over the Oreo crusts in the mini muffin cups. -
Step 4
Bake at 325°F (160°C) for 15-20 minutes, or until the edges are set and the centers are slightly jiggly. -
Step 5
Let cheesecakes cool in the muffin tin for 10 minutes, then transfer to a wire rack to cool completely. -
Step 6
Chill in the refrigerator for at least 2 hours before serving.
Important Information
Nutrition Facts (Per Serving)
It is important to consider this information as approximate and not to use it as definitive health advice.
Allergy Information
Please check ingredients for potential allergens and consult a health professional if in doubt.