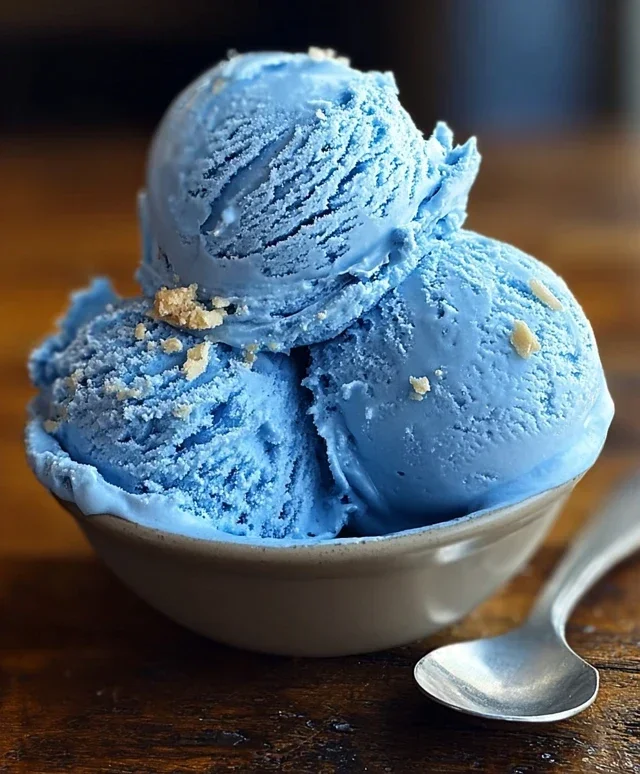
Blue Moon Ice Cream- Easy Nostalgic Recipe
Blue Moon Ice Cream is more than just a dessert; it’s a nostalgic journey for many, a vibrant splash of color, and a flavor that sparks curiosity and delight. If you’ve ever encountered this mysteriously hued treat, you likely remember its distinct, almost fruity yet subtly almond-like taste. It’s the kind of ice cream that makes you pause, point, and ask, “What is that flavor?” The allure of Blue Moon Ice Cream lies in its playful unpredictability and its ability to transport us back to carefree summer days and carnival visits. Unlike more common flavors, Blue Moon Ice Cream stands out with its electric blue color and a flavor profile that’s famously hard to pin down, making each spoonful an adventure. Today, we’re diving deep into the delightful world of this iconic dessert, so you can recreate that magical experience in your own kitchen. Get ready to whip up a batch of your very own Blue Moon Ice Cream!
Blue Moon Ice Cream
There’s something undeniably magical about Blue Moon ice cream. Its vibrant, otherworldly hue and uniquely sweet, slightly nutty flavor have made it a nostalgic favorite for generations. While its exact origin extracts are a bit of a mystery, often attributed to Wisconsin or Michigan diners, one thing is for sure: it’s a delightful departure from the usual vanilla and chocolate. This recipe aims to capture that elusive Blue Moon essence right in your own kitchen, creating a creamy, dreamy treat that’s perfect for a summer afternoon or any time you need a little whimsical joy. Don’t be intimidated by the color; the flavor is what truly shines through, a delicate dance of vanilla and almond that’s both comforting and intriguing.
Ingredients:
Crafting Your Blue Moon Masterpiece: The Instructions
Creating this delightful ice cream is a straightforward process, but it does require a bit of patience, especially when it comes to chilling and churning. The key is to start with well-chilled ingredients and equipment, which will help ensure a smooth and creamy texture.
1. Preparing the Custard Base
Begin extract by combining the heavy cream, whole milk, and granulated sugar in a medium-sized saucepan. Place the saucepan over medium heat. Stir constantly with a whisk or spoon, ensuring that the sugar dissolves completely. You want to heat the mixture until it’s warm to the touch and small bubbles just begin extract to form around the edges of the pan. This warming process helps the sugar dissolve and also starts to temper the dairy, setting the stage for a richer ice cream. Avoid bringin extractg the mixture to a rolling boil, as this can scorch the milk and affect the final flavor and texture. Once warmed through and the sugar is dissolved, remove the saucepan from the heat.
2. Infusing the Flavors
Now comes the moment to add those signature Blue Moon flavors. Stir in the vanilla extract and the almond extract into the warm dairy mixture. The almond extract is crucial here, as it contributes that subtle, almost mysterious nutty undertone that sets Blue Moon apart from a simple vanilla ice cream. Make sure to incorporate them thoroughly. At this stage, you could also add a pinch of salt, though it’s not strictly traditional for this recipe; a tiny bit of salt can actually enhance the sweetness and overall flavor complexity.
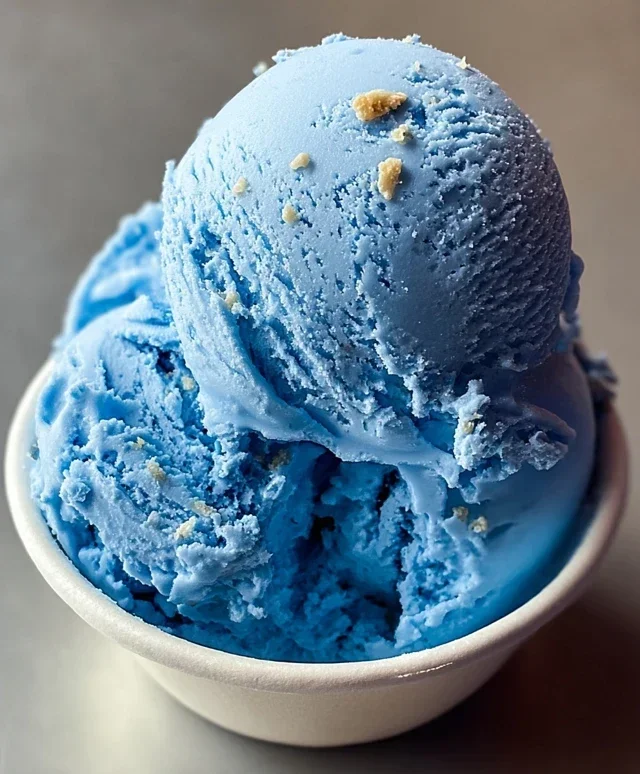
3. Achieving the Iconic Hue
This is where the magic truly happens! Add the blue food coloring to the mixture, a few drops at a time, stirring well after each addition. The goal is to achieve a vibrant, sky-blue color, reminiscent of a clear summer sky or, well, a Blue Moon! The amount of food coloring needed will depend on the brand you’re using and the intensity of color you desire. It’s always best to start with less and add more gradually to avoid an overly dark or artificial-looking shade. Remember, the color will lighten slightly when the ice cream is churned and frozen. Stir until the color is uniform throughout the base.
4. Chilling the Base to Perfection
Once your base is beautifully colored and flavored, it’s essential to chill it thoroughly. Pour the mixture into a clean bowl or container. Cover it tightly with plastic wrap, pressing the wrap directly onto the surface of the liquid to prevent a skin from forming. Place the covered mixture in the refrigerator for at least 4 hours, or preferably overnight. The longer and colder the base gets, the better your ice cream will churn. A well-chilled base will freeze more quickly in your ice cream maker, resulting in smaller ice crystals and a smoother, creamier texture. Don’t rush this step; it’s critical for success!
5. Incorporating Optional Cherries
If you’ve decided to add the maraschino cherries, this is a good time to prepare them. Drain them well and give them a rough chop. Set them aside. We’ll add these later in the churning process.
6. Churning Your Blue Moon Dream
It’s time to bring your ice cream to life! Retrieve your thoroughly chilled ice cream maker. Ensure the bowl of your ice cream maker is frozen according to the manufacturer’s instructions. Pour the cold Blue Moon base into the churner. Begin extract churning according to your ice cream maker’s instructions. Typically, this will take about 20-30 minutes. During the last 5-10 minutes of churning, if you’re using the optional maraschino cherries, add the chopped cherries to the ice cream maker. This allows them to be evenly distributed throughout the ice cream without being completely pulverized by the churning process. You’re looking for a soft-serve consistency at this point.
7. Freezing for Ultimate Creaminess
Once the ice cream has reached a soft-serve consistency, transfer it immediately to a freezer-safe container. Smooth the top with a spatula. Cover the container tightly, either with a lid or with plastic wrap pressed directly onto the surface of the ice cream to prevent ice crystals from forming. Place the container in the freezer for at least 2-4 hours, or until the ice cream is firm and scoopable. This hardening process is essential for achieving that classic, scoopable ice cream texture. Enjoy your homemade Blue Moon ice cream!
Conclusion:
There you have it! My recipe for Blue Moon Ice Cream is a vibrant, creamy, and delightfully unique treat that’s surprisingly easy to make at home. Its distinctive almond-vanilla flavor and eye-catching azure hue make it a guaranteed crowd-pleaser, perfect for summer gatherings, birthdays, or simply when you crave something a little out of the ordinary. I truly believe this Blue Moon Ice Cream recipe offers a fantastic way to bring a touch of nostalgic fun and deliciousness to your dessert table. Don’t hesitate to give it a try – you might just find your new favorite ice cream flavor!
For serving, this ice cream is divine on its own, but it also pairs wonderfully with a sprinkle of toasted almonds, a drizzle of whipped cream, or even as the base for a show-stopping milkshake. If you’re feeling adventurous with variations, consider adding a swirl of blueberry puree for an extra fruity punch or a hint of lemon zest for a brighter citrus note. The possibilities are as endless as your imagin extractation!
Frequently Asked Questions:
Why is Blue Moon Ice Cream blue?
The signature blue color of Blue Moon Ice Cream traditionally comes from blue food coloring. Some recipes also incorporate a touch of blue spirulina for a more natural coloring option, though this can sometimes subtly alter the flavor profile.
What does Blue Moon Ice Cream taste like?
The flavor of Blue Moon Ice Cream is often described as a unique blend of almond and vanilla, with some detecting hints of citrus or even marshmallow. It’s a sweet, creamy, and slightly nutty profile that’s distinct from many other ice cream flavors.
Can I make this recipe without an ice cream maker?
Yes! While an ice cream maker provides the smoothest texture, you can achieve a delicious result without one. You’ll need to use a no-churn method, typically involving sweetened condensed milk and whipped cream, and stir the mixture periodically as it freezes to break up ice crystals.
Blue Moon Ice Cream
A vibrant and uniquely flavored ice cream with a sweet, creamy base and a hint of almond.
Ingredients
-
2 cups heavy cream
-
1 cup whole milk
-
3/4 cup granulated sugar
-
1 teaspoon vanilla extract
-
1 teaspoon almond extract
-
Blue food coloring, as needed
-
1/4 cup maraschino cherries, chopped (optional)
Instructions
-
Step 1
In a medium bowl, whisk together the heavy cream, whole milk, granulated sugar, vanilla extract, and almond extract until the sugar is dissolved. -
Step 2
Add blue food coloring a few drops at a time, stirring until the desired blue hue is achieved. Be careful not to over-color. -
Step 3
Pour the mixture into your ice cream maker and churn according to the manufacturer’s instructions. -
Step 4
If using, gently fold in the chopped maraschino cherries during the last few minutes of churning or just before transferring to a freezer-safe container. -
Step 5
Transfer the ice cream to a freezer-safe container, cover, and freeze for at least 2-4 hours, or until firm.
Important Information
Nutrition Facts (Per Serving)
It is important to consider this information as approximate and not to use it as definitive health advice.
Allergy Information
Please check ingredients for potential allergens and consult a health professional if in doubt.